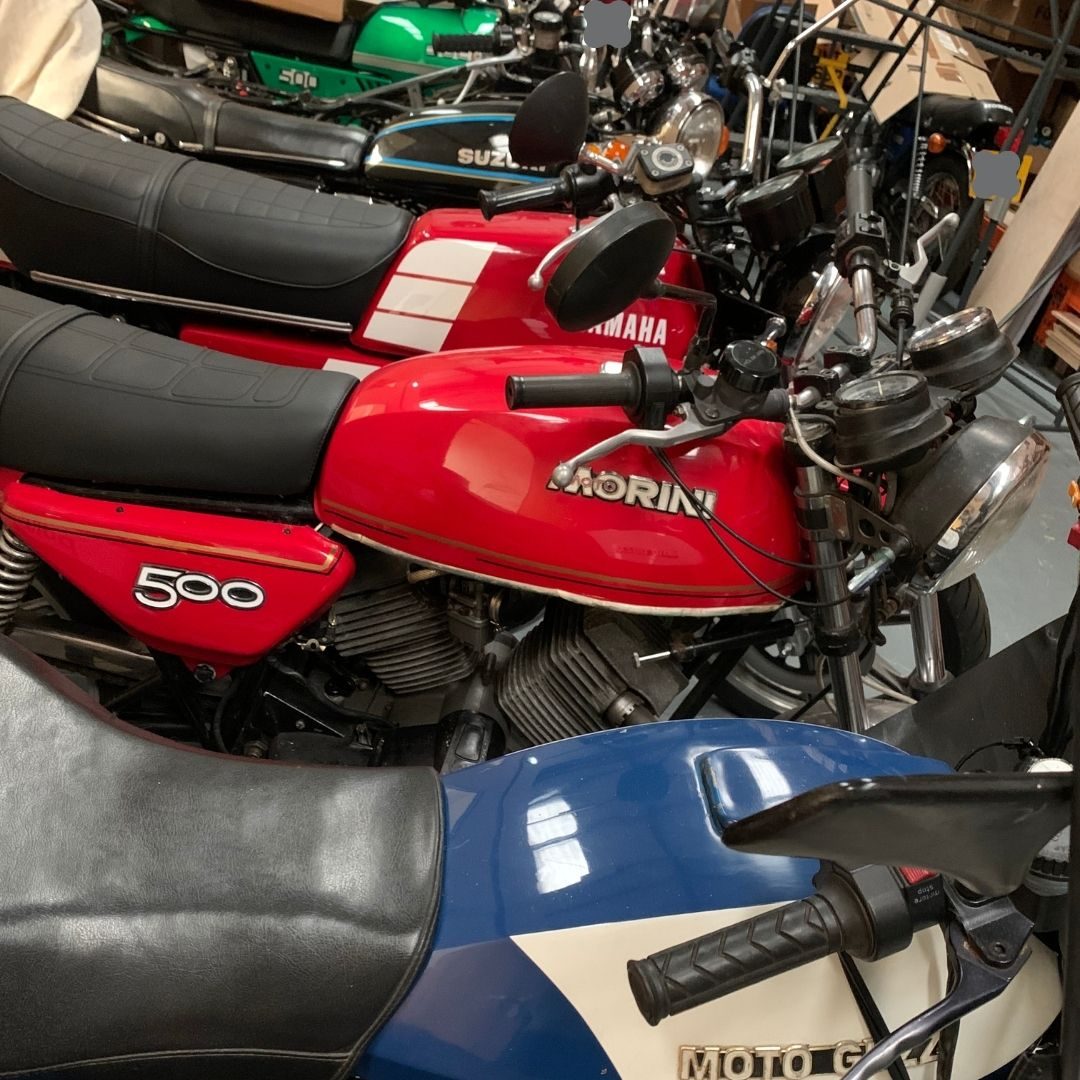
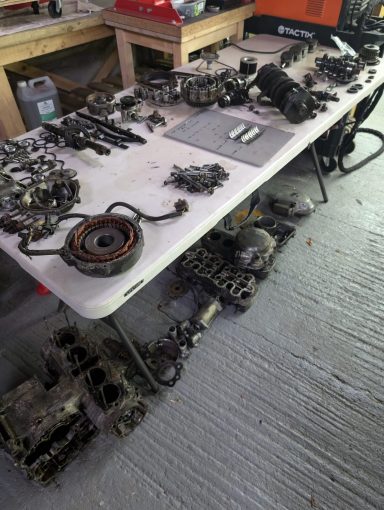
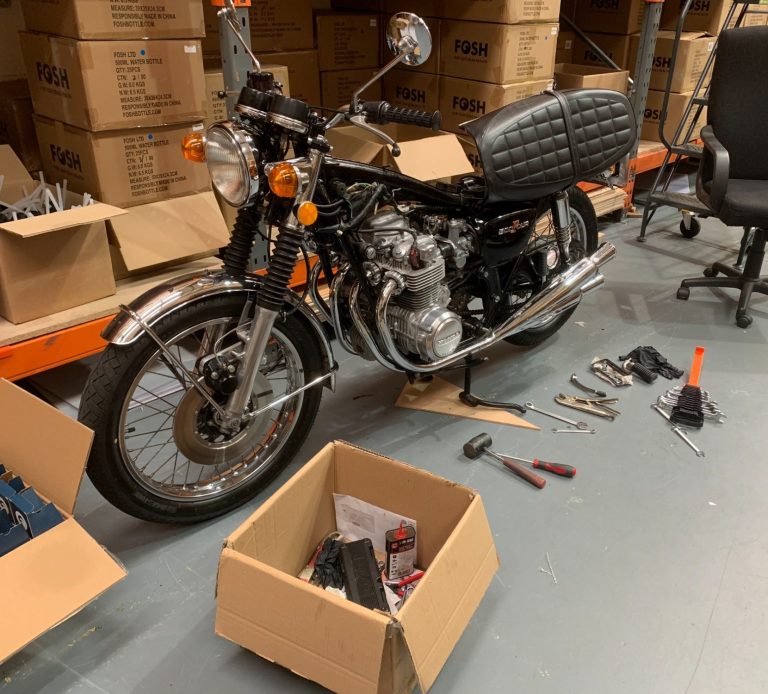
Above is a small part of the collection
The collection grows and there are some absolute rough'ns in there, that said they are all 100% gems in my eyes!
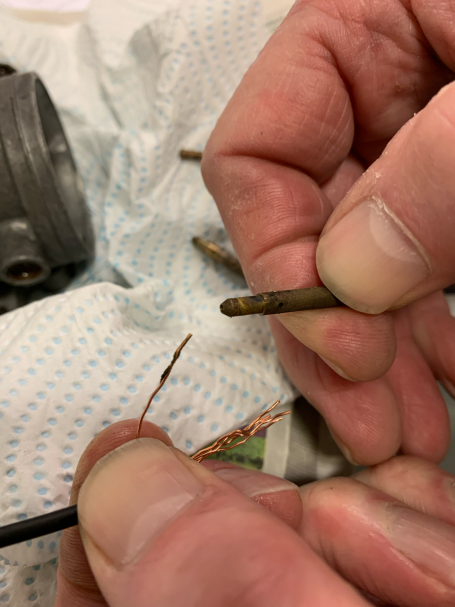
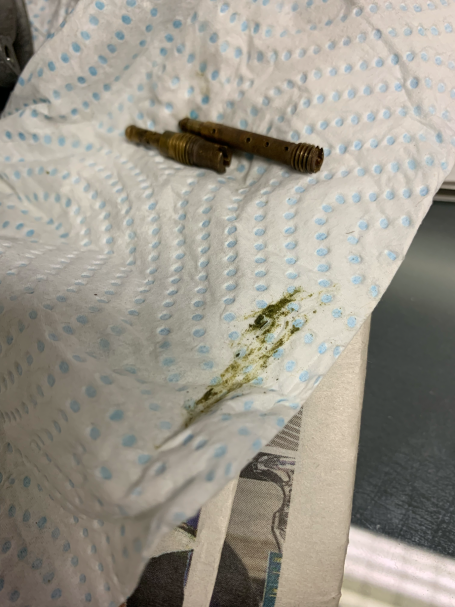
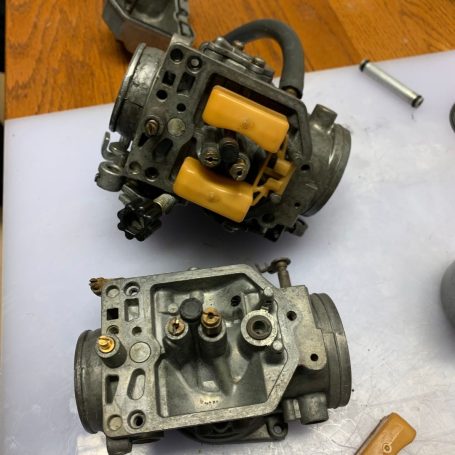
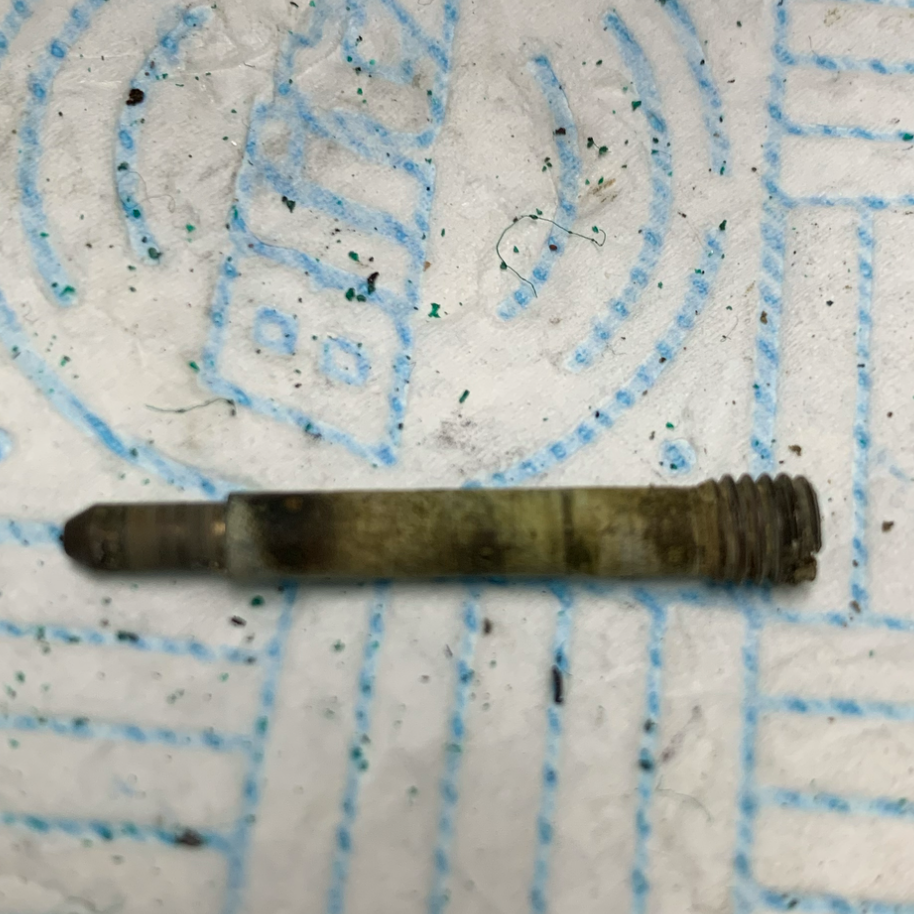
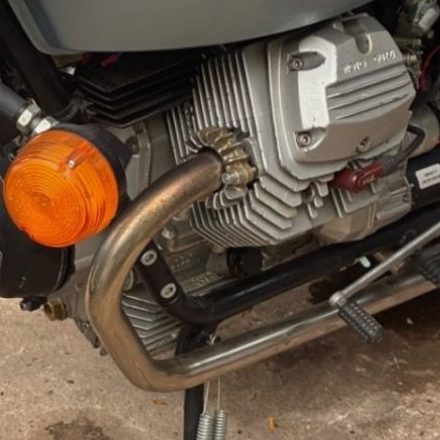
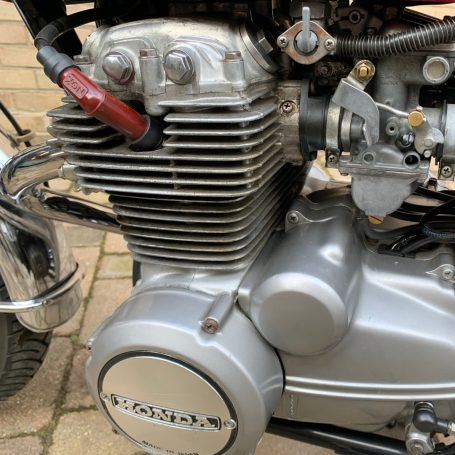
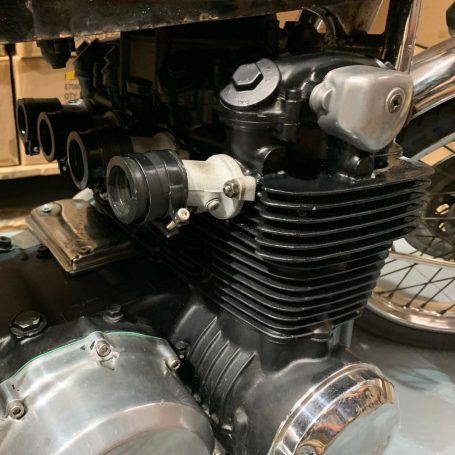
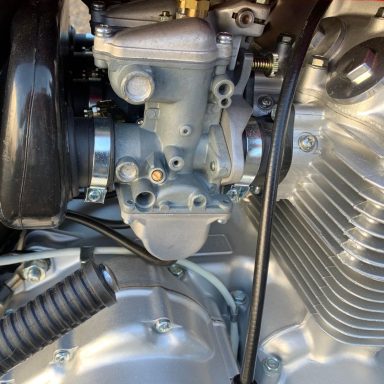
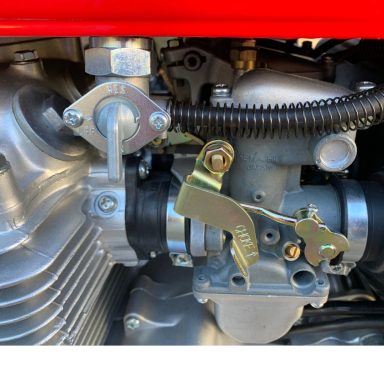
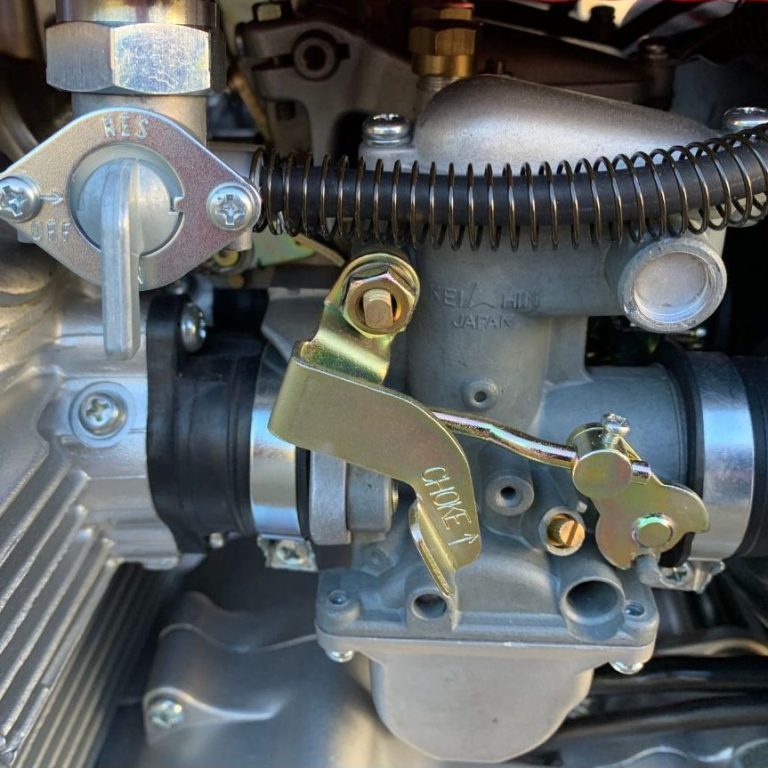
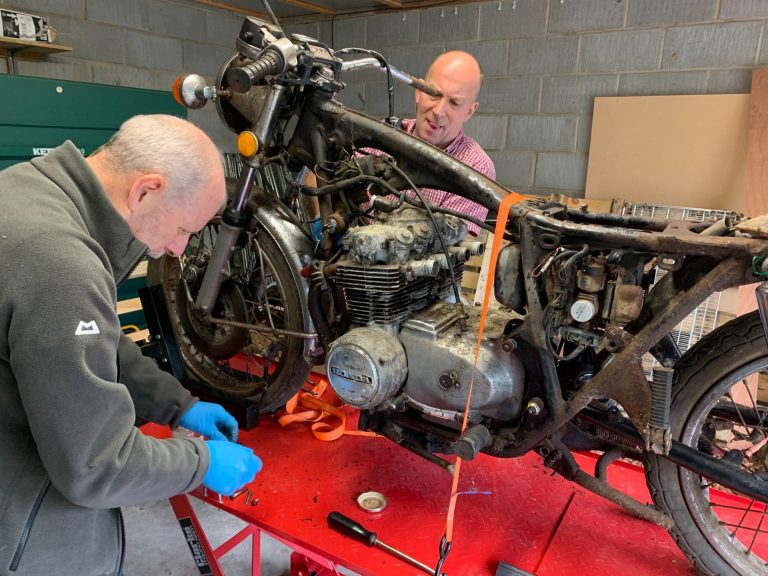
A further day on our Honda CX500 Eurosport, this is becoming a real problem these carbs!
So today we did, maybe what we should have done all along, check youtube and found we had missed the main jet which is set way down in a recess. Now I realise that sounds a bit strange but the replacement kit had no replacement and the carbs have another 2 jets so it is not as silly as it sounds, well almost!
Now these jets were absolutely clagged with ****, see images, now we feel like the issue is resolved so at the weekend we will get back to the reassembly, again!!
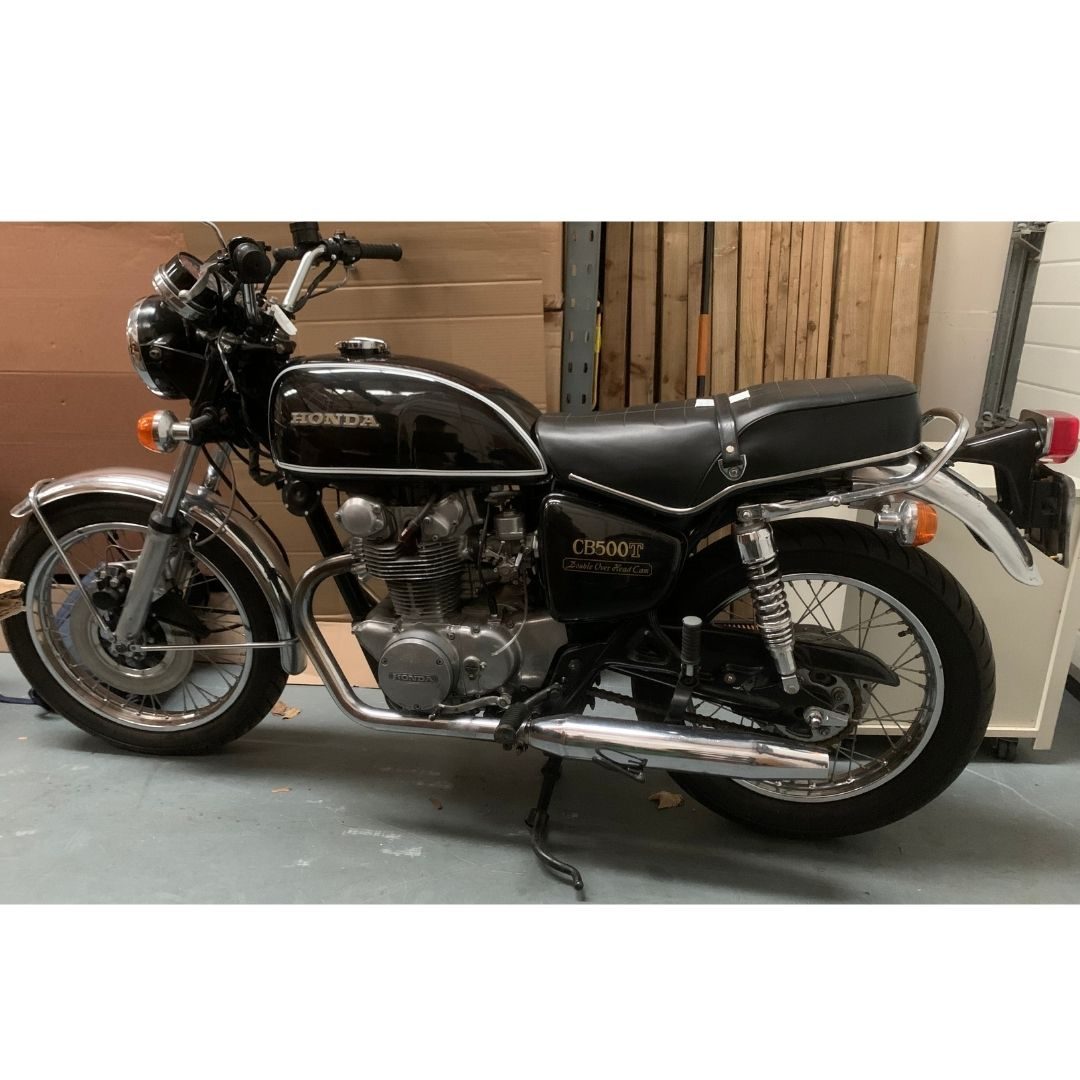
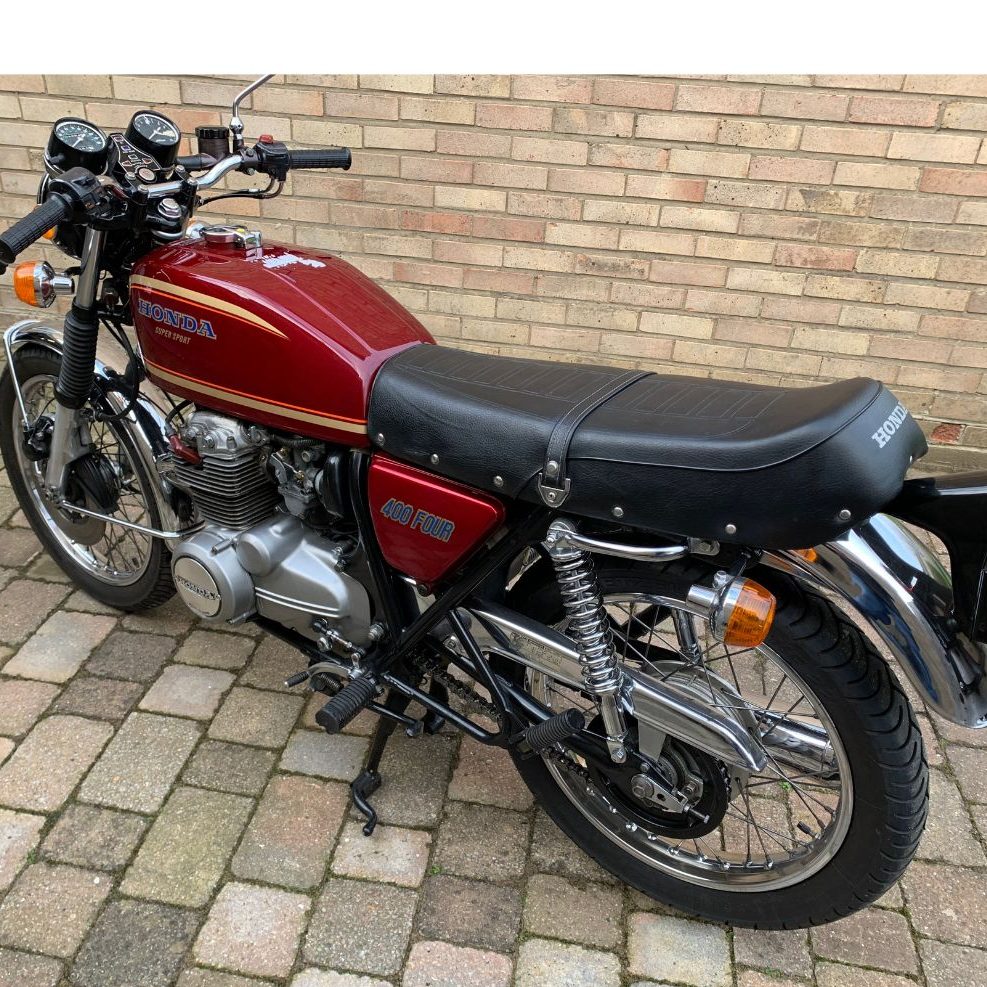
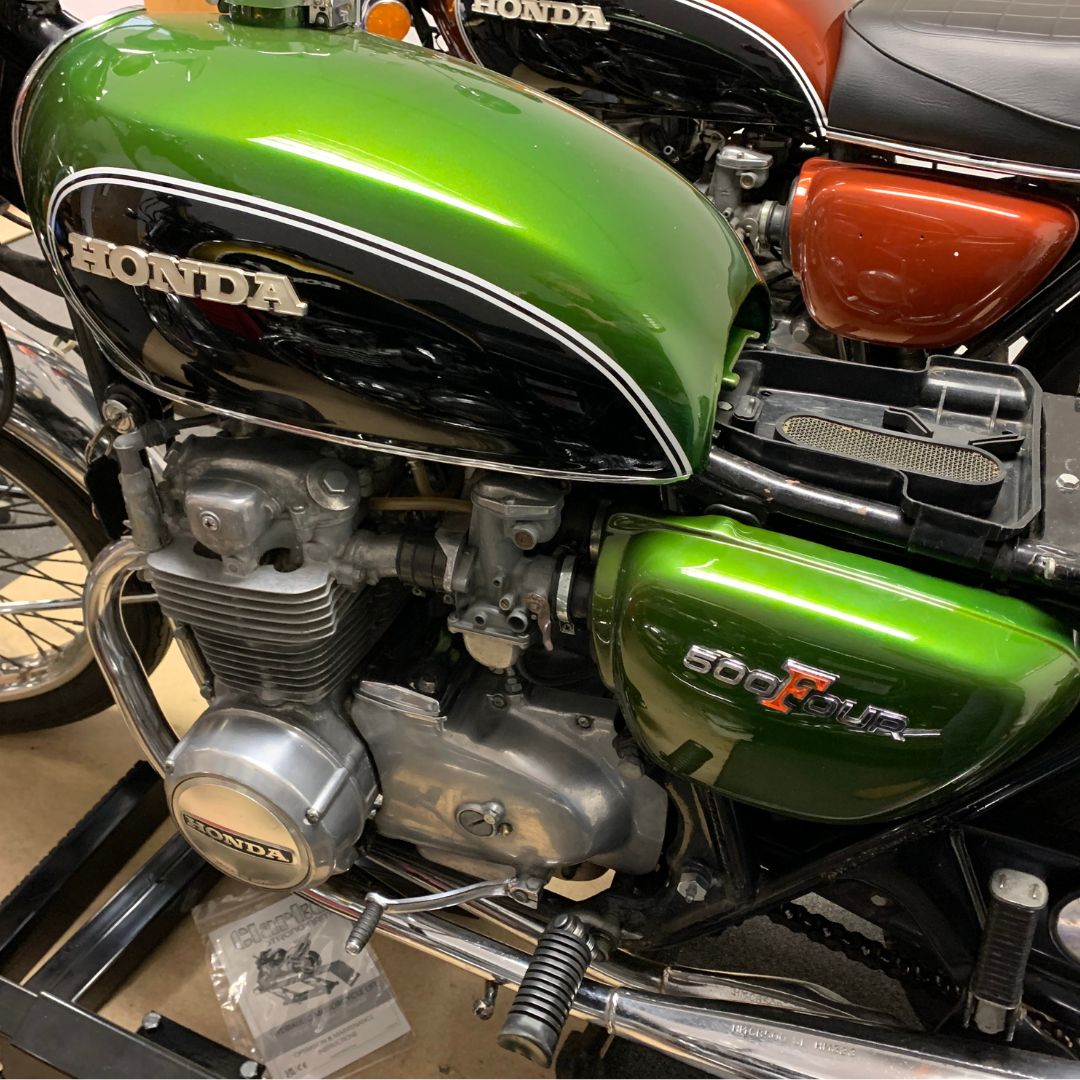
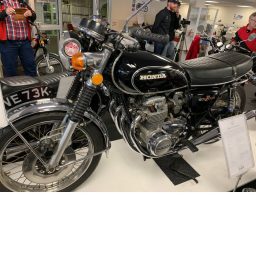
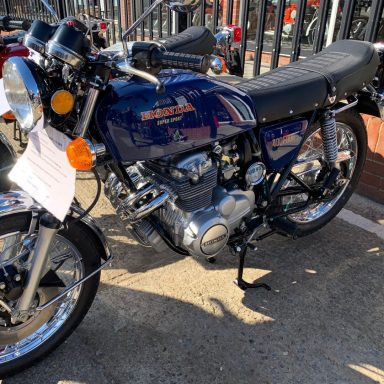
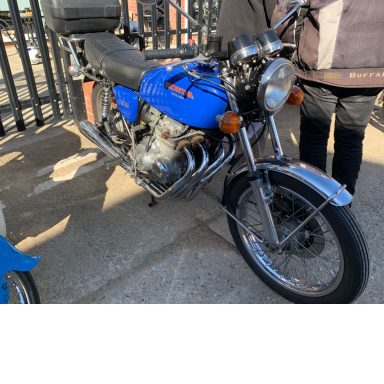
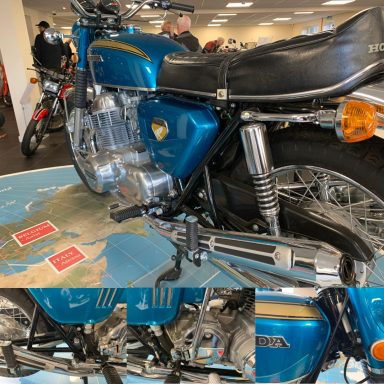
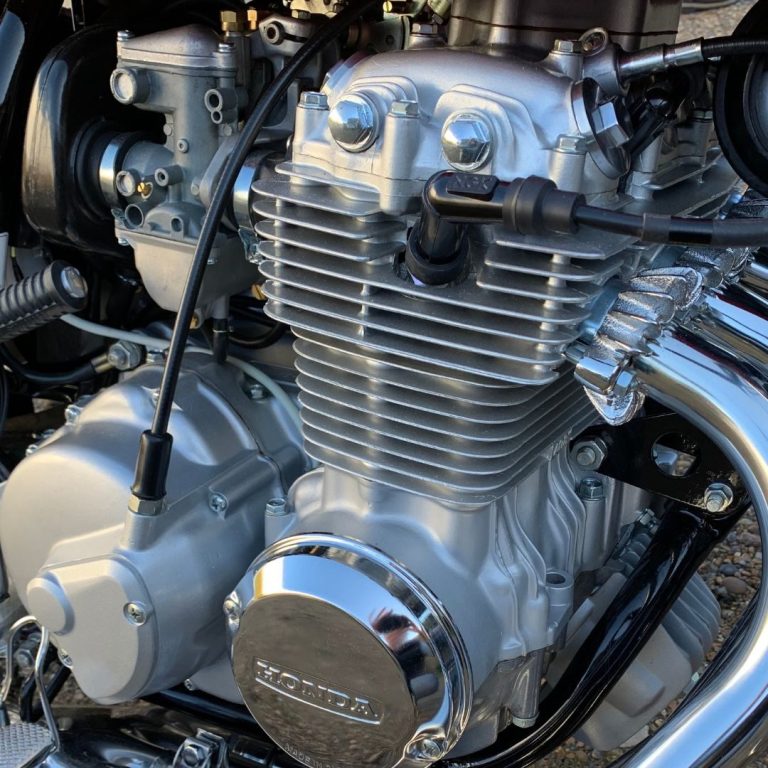
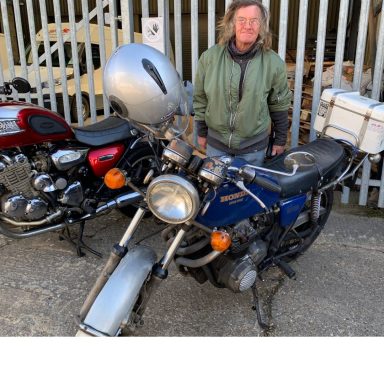
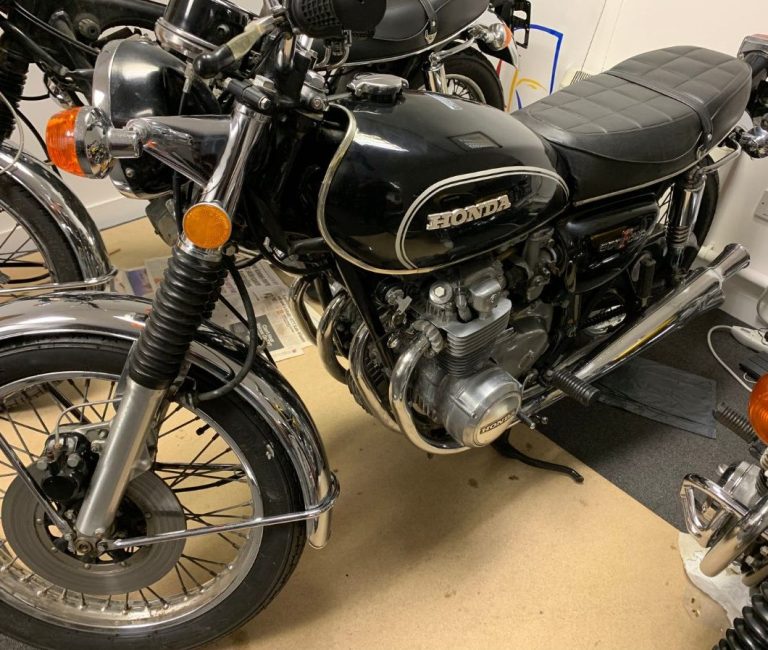
We acquire a restored Honda CB500T '76, she is for one of the bores who had a CB200 "back in the day" which are really underpowered for modern roads however this bike will not worry about that!
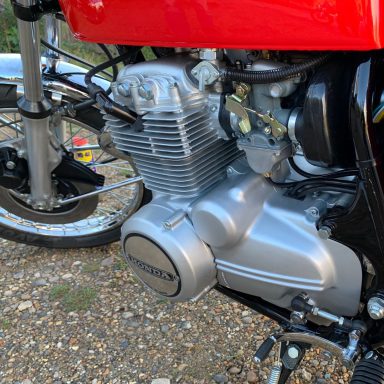
The 1979 Honda CB500T Twin represented Honda’s transitional period in motorcycle design blending traditional engineering with emerging reliability standards of the late 1970s. Powered by a 498cc air-cooled parallel twin engine the CB500T emphasised smooth dependable performance over outright speed. Its conservative styling, electric start and durable construction made it accessible to everyday riders of the time while reflecting Honda’s reputation for practicality and quality. Though not as celebrated as some earlier CB models the CB500T illustrates the era’s shift toward user-friendly and dare we say early adopters for emissions conscious motorcyclists, yes even back then and remains an important example of late 1970s Japanese road bikes for our collection and we are delighted to have her.
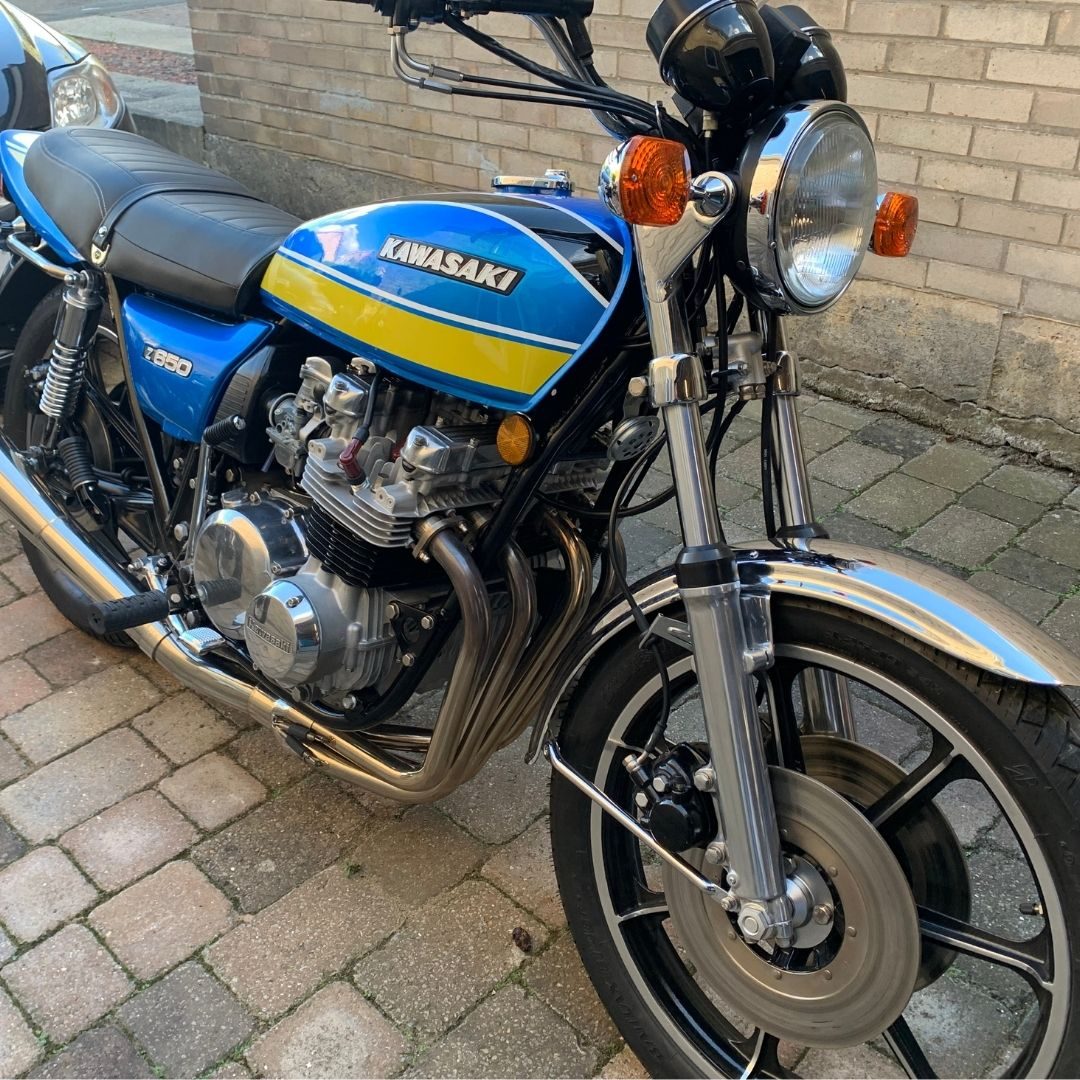
We welcome "Mallard" our newest Kawasaki Z650
A Mid Weight Marvel
Released as part of Kawasaki’s highly respected Z-series the Kawasaki Z650 B2 quickly established itself as a serious contender in the mid-weight motorcycle category. The bike borrowed heavily from its big brother, the Z1 900, ours indeed sporting the 900 colour scheme, combining strong performance with impressive handling qualities not always found in 1970s machines.
Powered by a 652cc air-cooled, DOHC inline-four engine the B2 version produced around 64 horsepower offering smooth and reliable power delivery. Mated to a 5-speed gearbox it could reach speeds of over 115 mph which was remarkable for its class at the time. The Z650 B2 offered excellent rigidity and agility making it a joy to ride on twisty roads.
The B2 featured subtle improvements over the B1, including revised switchgear and upgraded electrics and remains a cult classic, praised for its balance, reliability, and timeless design. For many riders, it was the perfect “everyday superbike” fast, affordable, and fun.
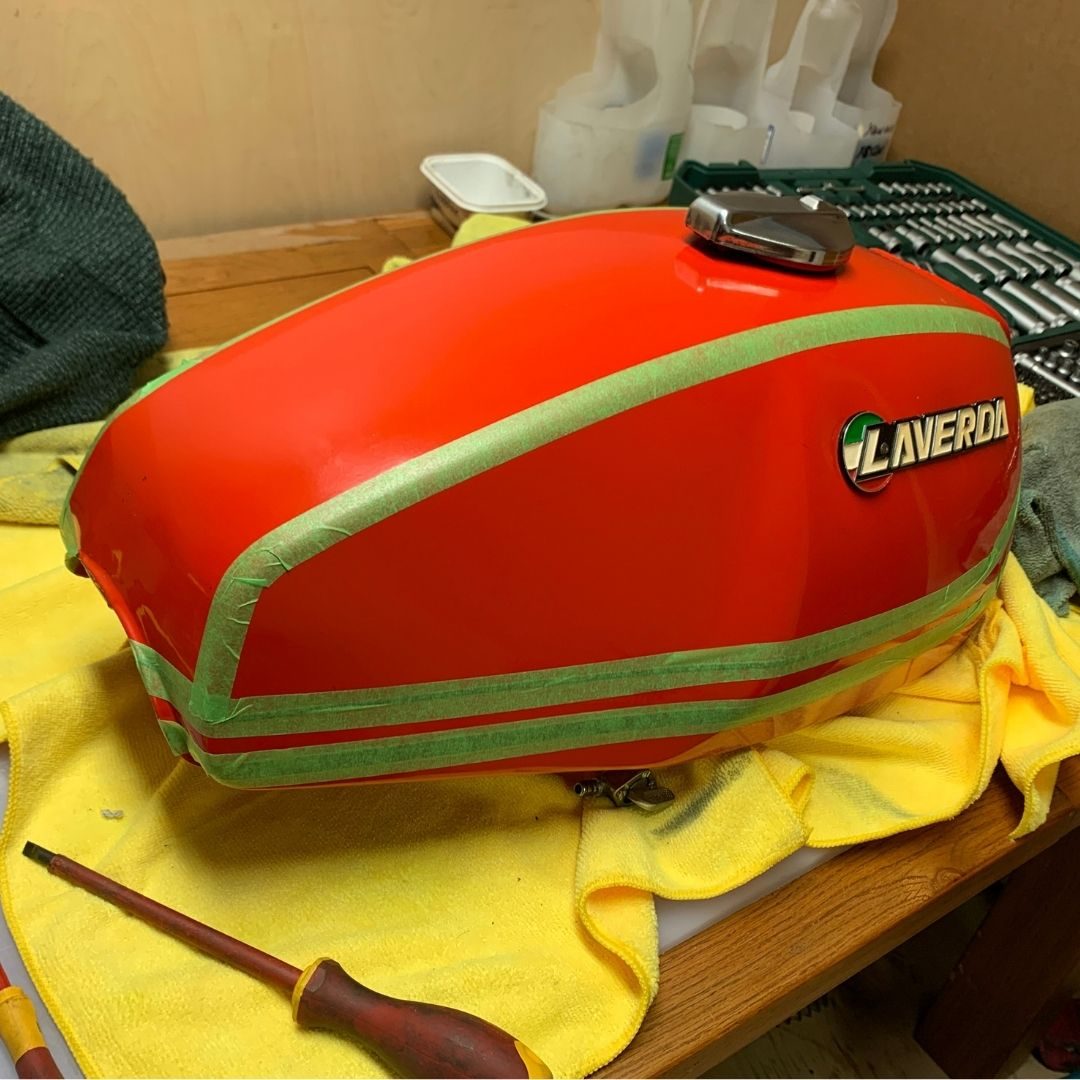
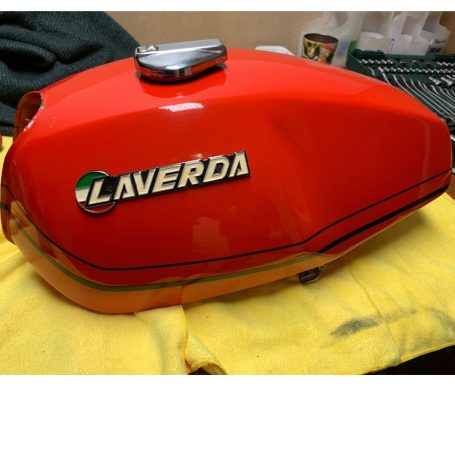
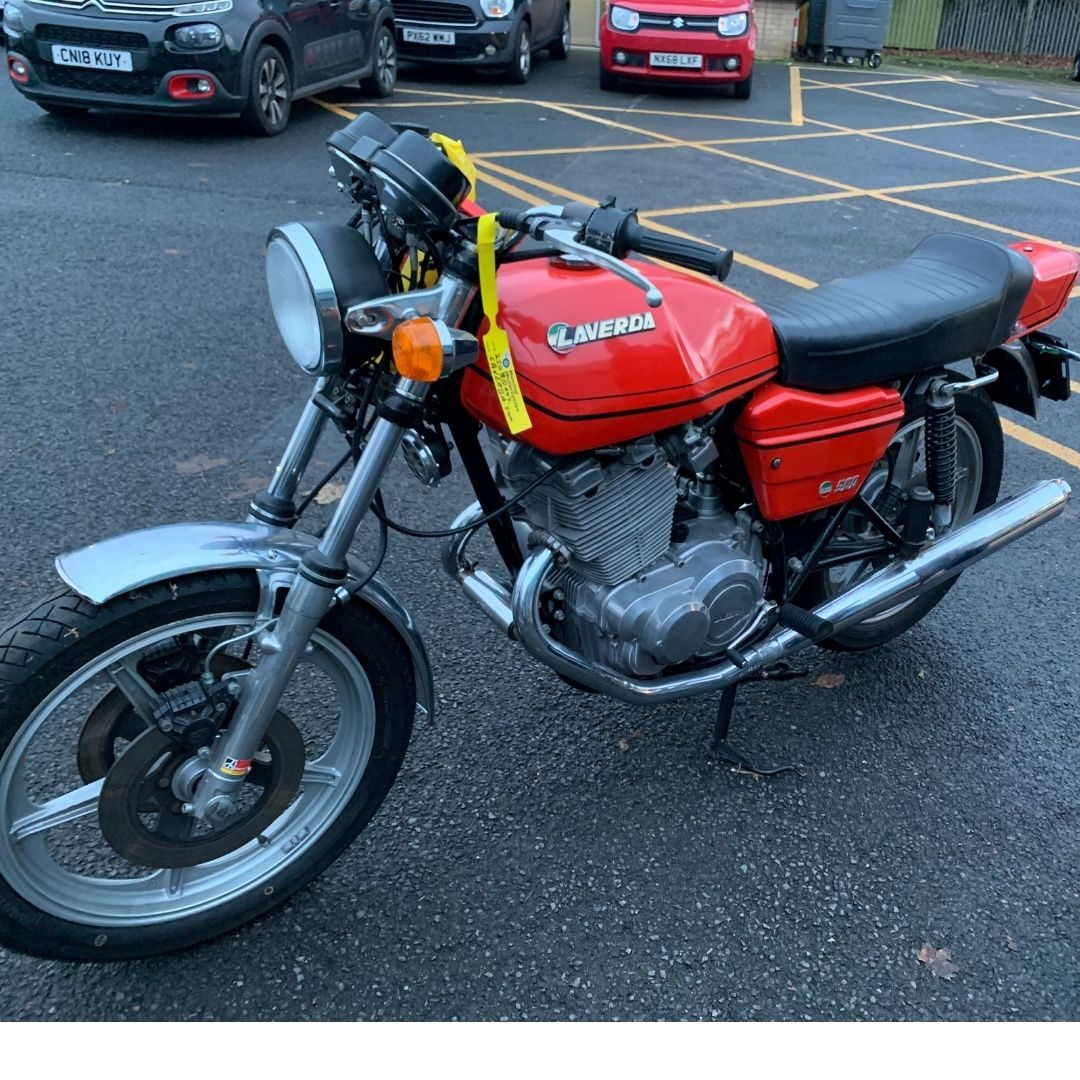
We set away with minor paint correction on our Laverda
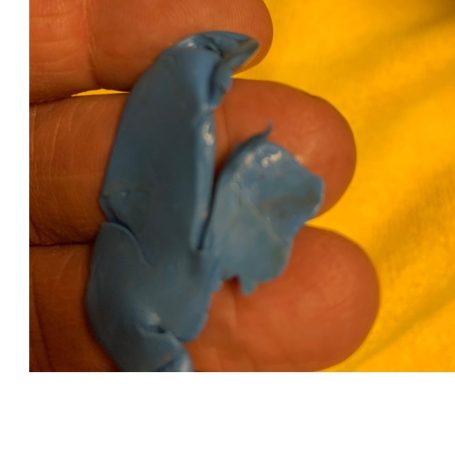
The result was promising as the colour really did come up well. We used two cutting pastes heavy and fine on our dual action random orbital polisher with a medium pad which worked well for the main flattening and scratch removal. After this we used quick detailer as the medium for a medium clay bar taking a very fine approach to the paint, that said you can see what was left on the picture opposite, it was surprising.
Then we tried to start her and typically the battery was gone, looks like we will need a new one. We managed to get her going with a jump starter and she seemed to run ok, the clutch was not working but this could just be it standing for such a while, time will tell.
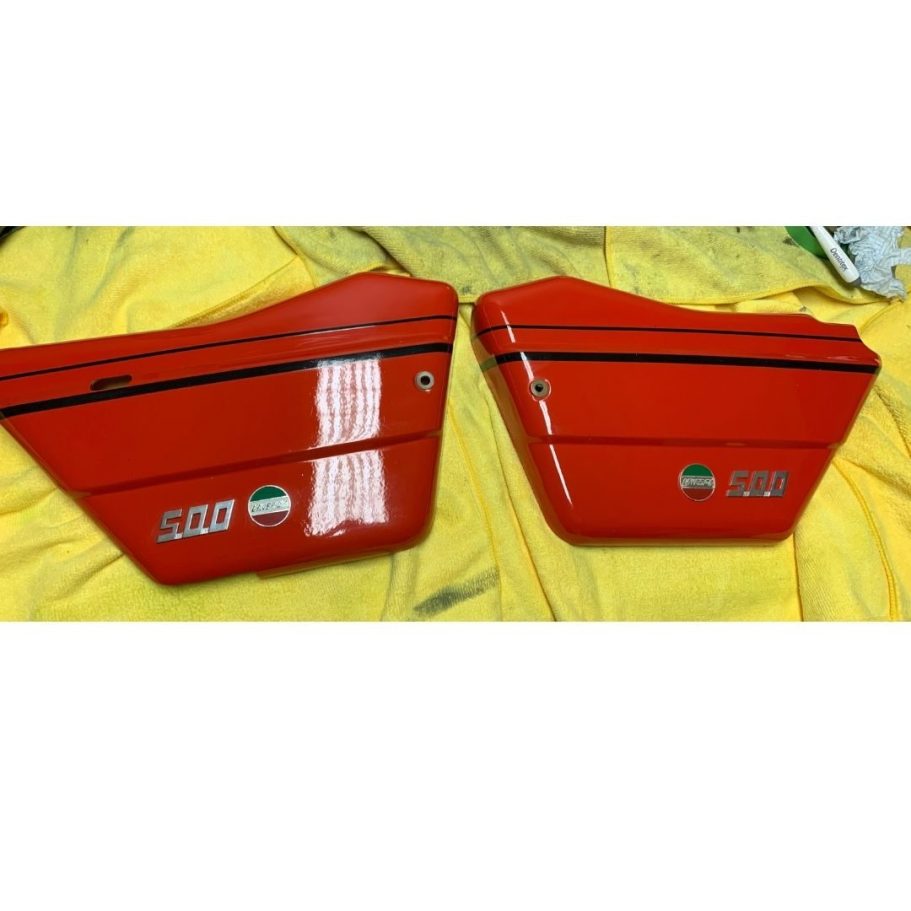
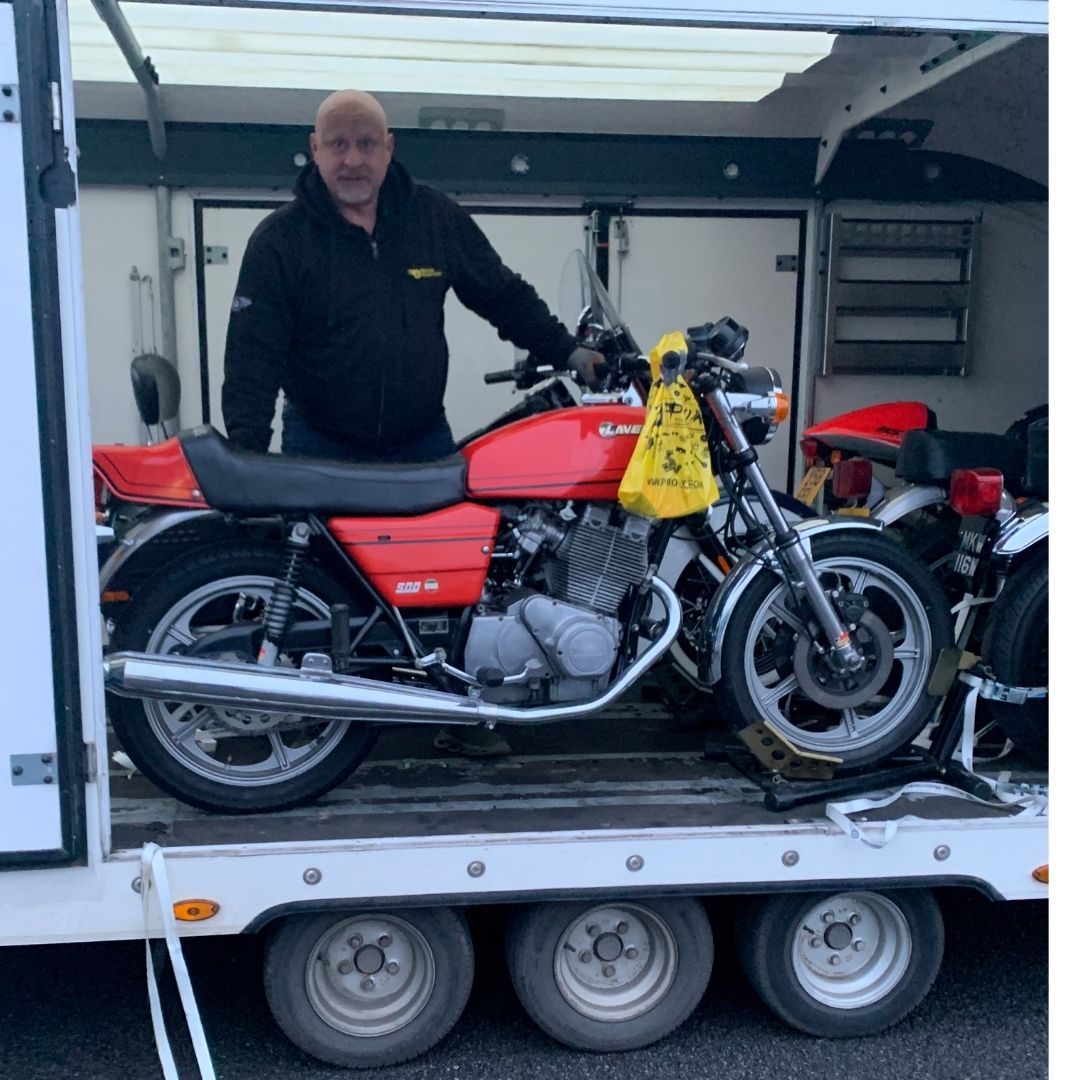
We welcome the beautiful Laverda 500 Twin to our collection
We’re thrilled to announce our newest addition to the collection is non other than the outstanding Laverda 500 Twin. The Jota we all knew of course but the 500 was easier to live with, quick enough to scare most of us and utterly drop dead gorgeous to boot! Never mind the looks though as this Italian machine represented one of the most interesting chapters in Laverda’s history and you can see the DNA running right through her.
Introduced in the late 1970s, ours is a '78, the Laverda 500 Twin marked a bold step for Laverda at a time when they were best known for big-bore triples she showcased a lighter more agile direction for the business. That said don't be fooled into thinking she was slow, this bike could still make its place heard with it's 500cc motor creating 44 horses at 9000 RPM so although a slightly buzzy power plant it was one that harnessed precision Italian engineering offering riders something that few bikes of its era could match.
Visually she is a stunning machine, unmistakably Italian lines, not too much chrome but enough and that signature red paintwork that was so synonymous in it's day! Now we all know about the quintessential orange Laverda but for me red is the one and is a little bit orangy when you look close so it covers all tastes really. It wasn’t just built to look good mind you Laverda knew the weakness' of the other offers namely handling where she was crafted from the outset to to be a real riders machine, a USP of Laverda for sure. The 500 Twin was praised for its stability, balance and ability to carve through corners with confidence right from the outset.
Today she remains one of those motorcycles that perfectly captures the spirit of late 1970s motorcycling mixing style, sound, and soul for those who seeked such things. For collectors and enthusiasts alike she is a bike that oozes character and craftsmanship even if she could never quite match the quality and finish in every part that made up of the Hondas of the day to be fair.
We’re delighted to have this rare and beautiful Laverda into our collection. This is one Italian classic that deserves to be enjoyed and that's exactly what we are going to do with her.
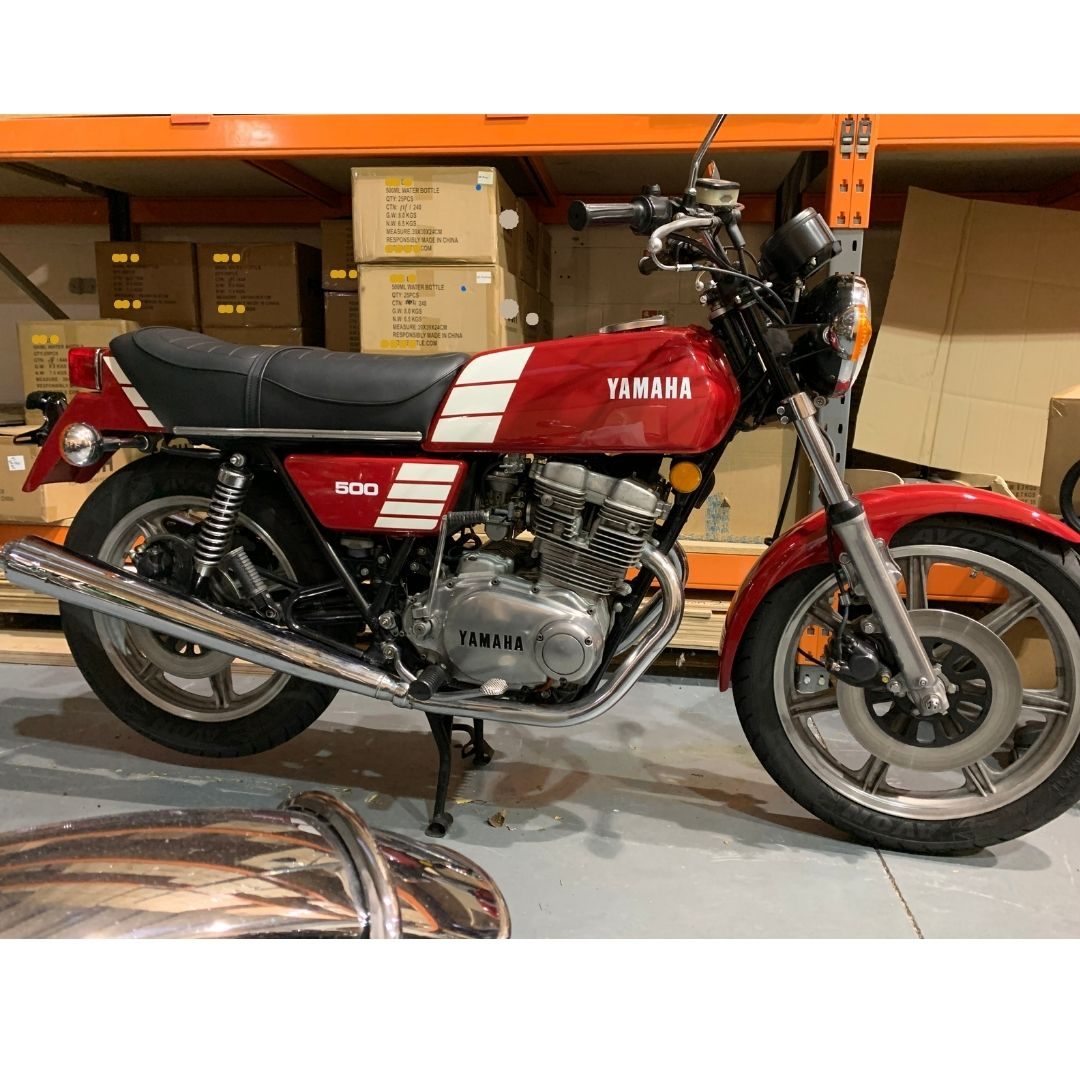
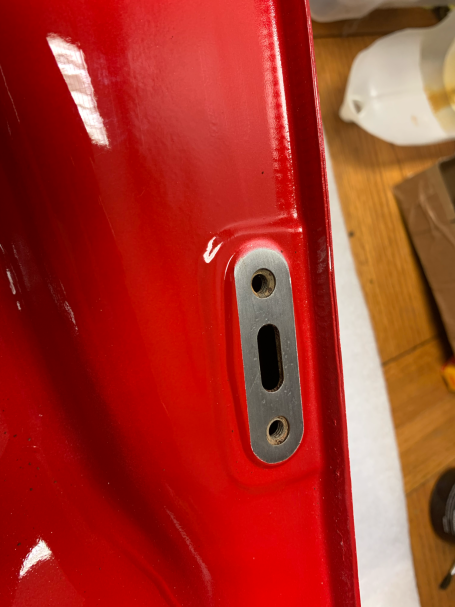
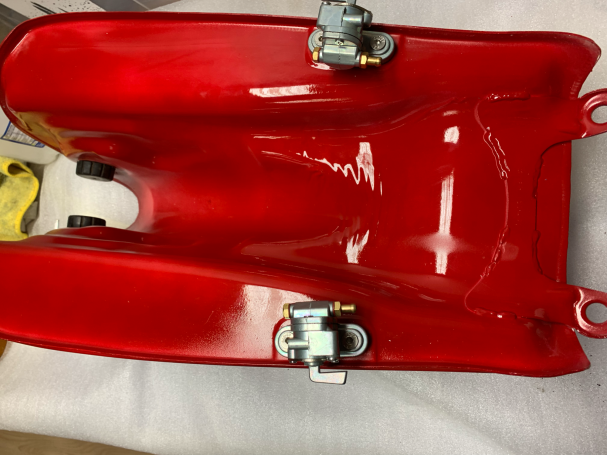
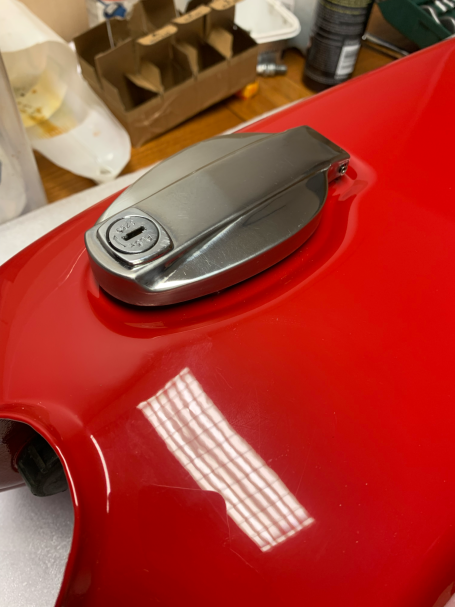
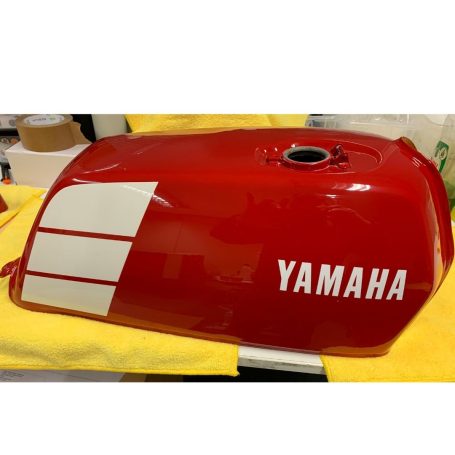
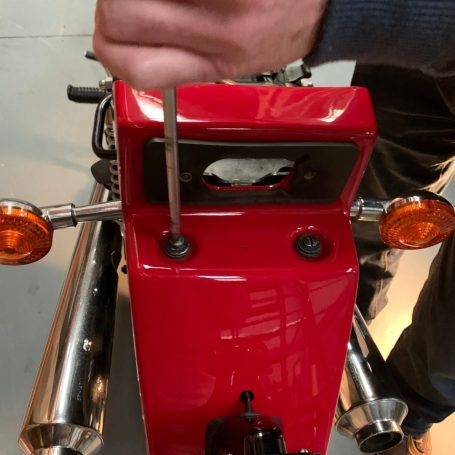
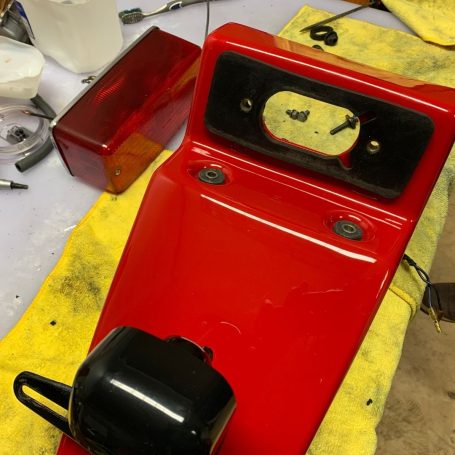
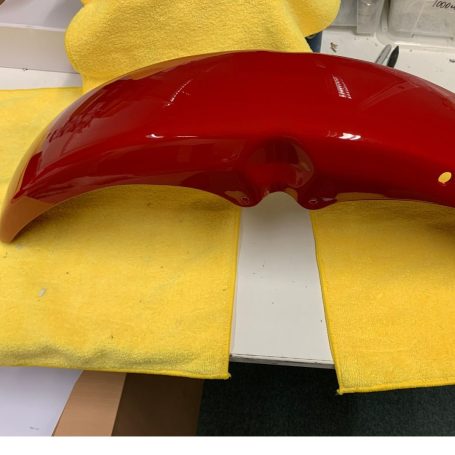
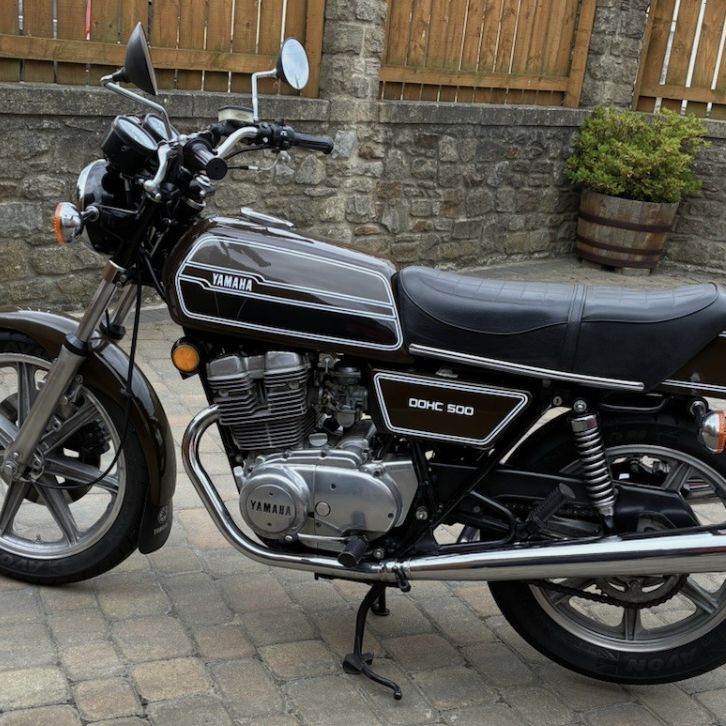
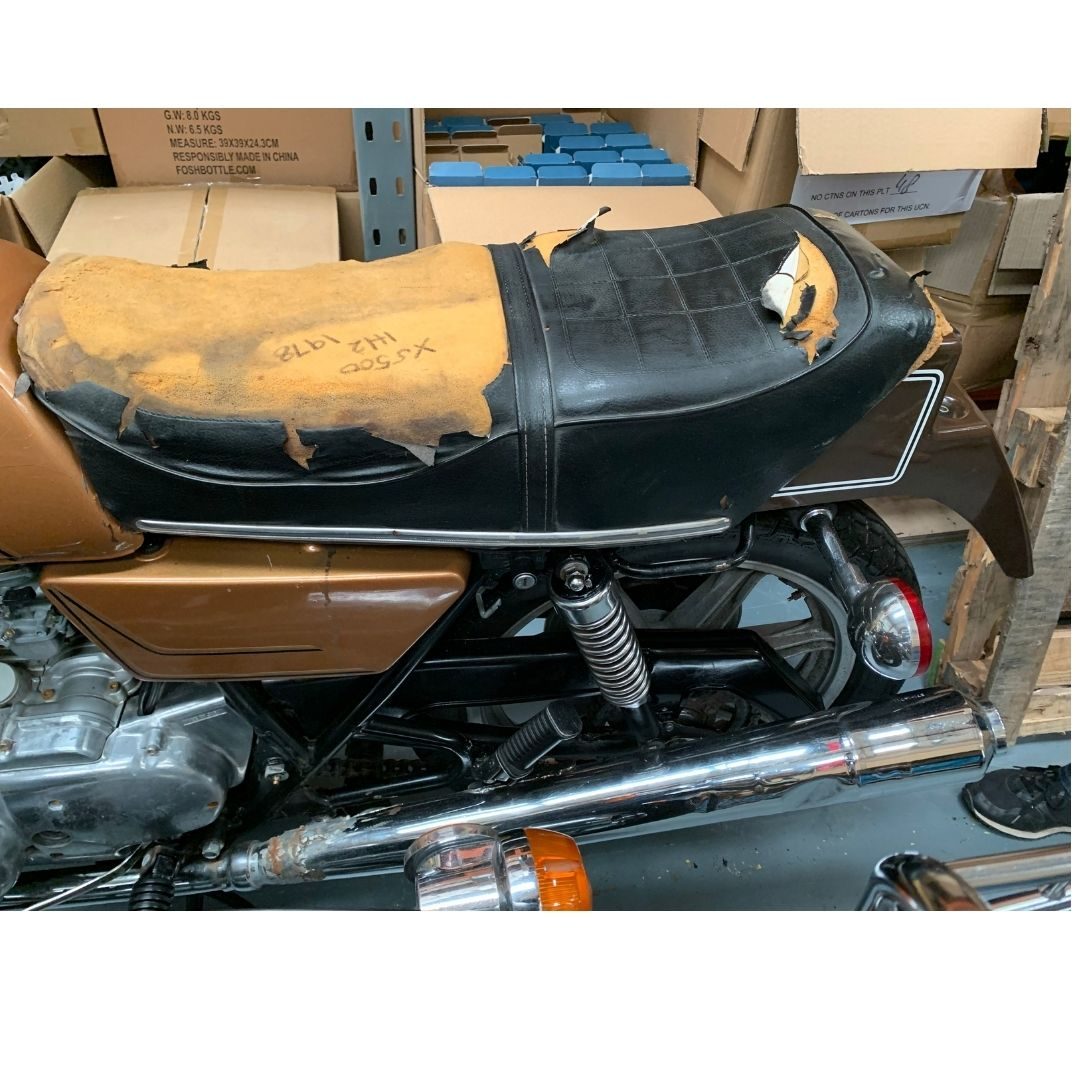
Well isn't she looking pretty! Our Yamaha XS500 has certainly transformed with her new coat of paint and for me the red really is the best colour for her. Thinking back this bike was the only bike I ever saw the colour used but it sets the bike off absolutely perfectly. We had some fun and games with the petcocks (fuel taps) though. There are two on the XS one feeding each carburettor as the fixing centres were wrong, typical non OEM spares issues we have all seen and nothing a bit of time, a drill and a bit of application could not solve. All in all we could not be happier with this bike and we look forward to spending time on the finer parts of her as we go forward, she is a very good example of this rare bike in near show condition that will be part of the bores collection for many years to come we hope.
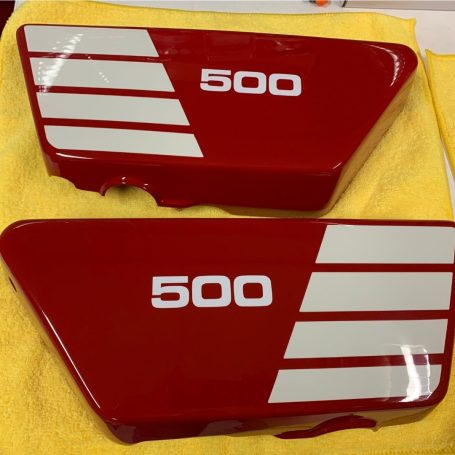
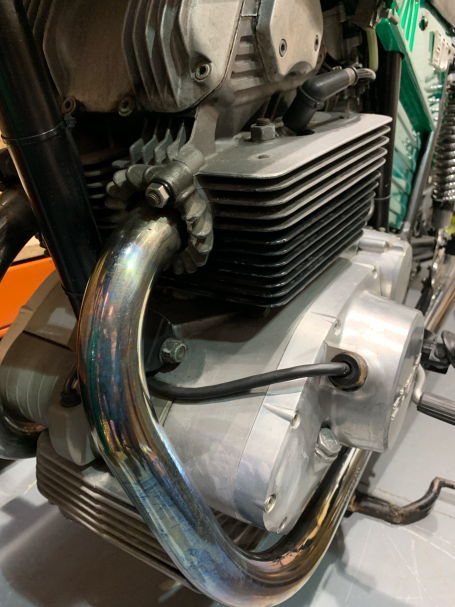
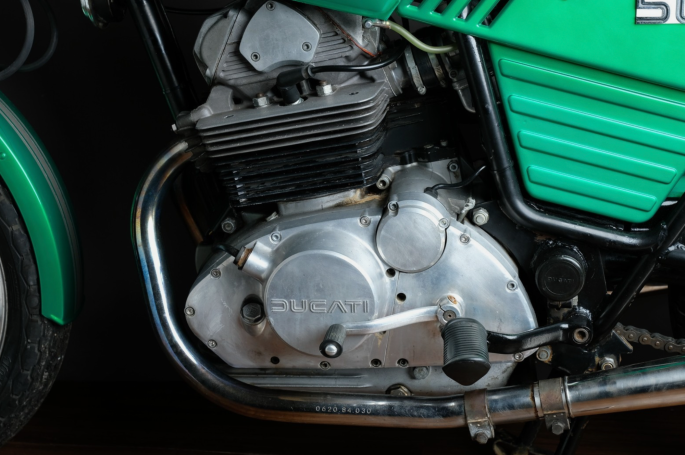
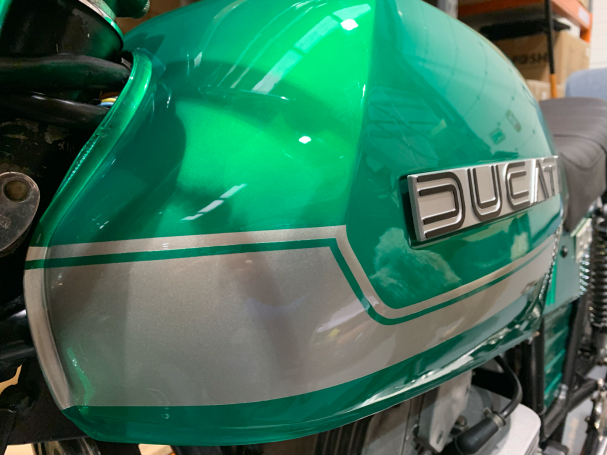
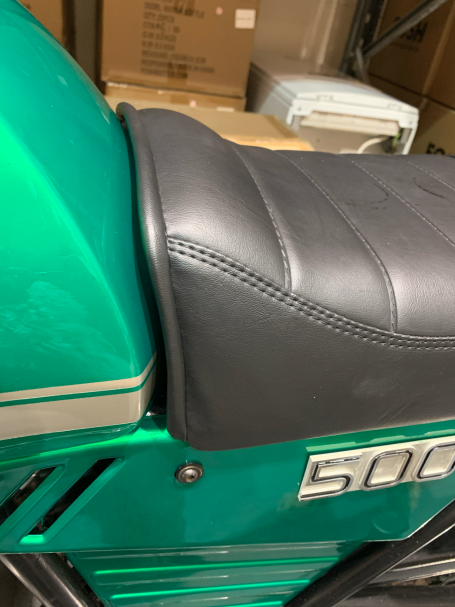
We acquire the beautiful 1977 Ducati 500 GTL!

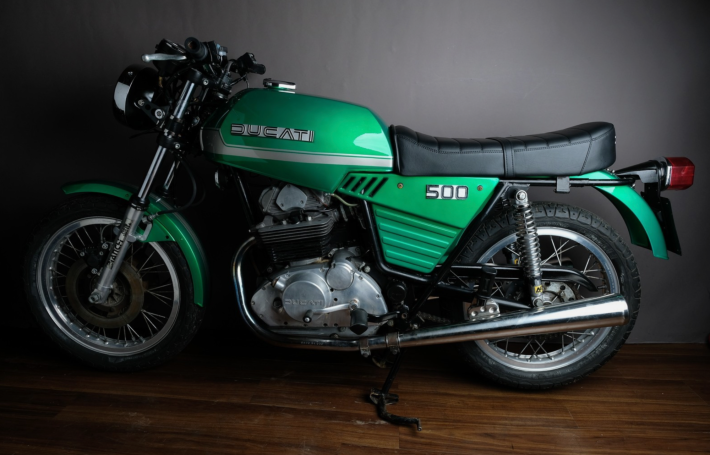
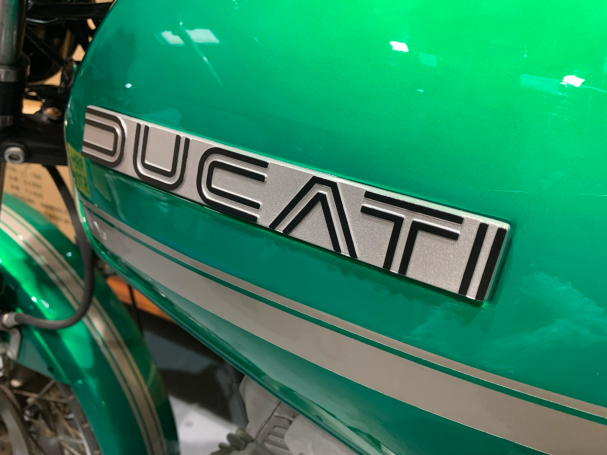
The way it looked in 1977 .. only in red
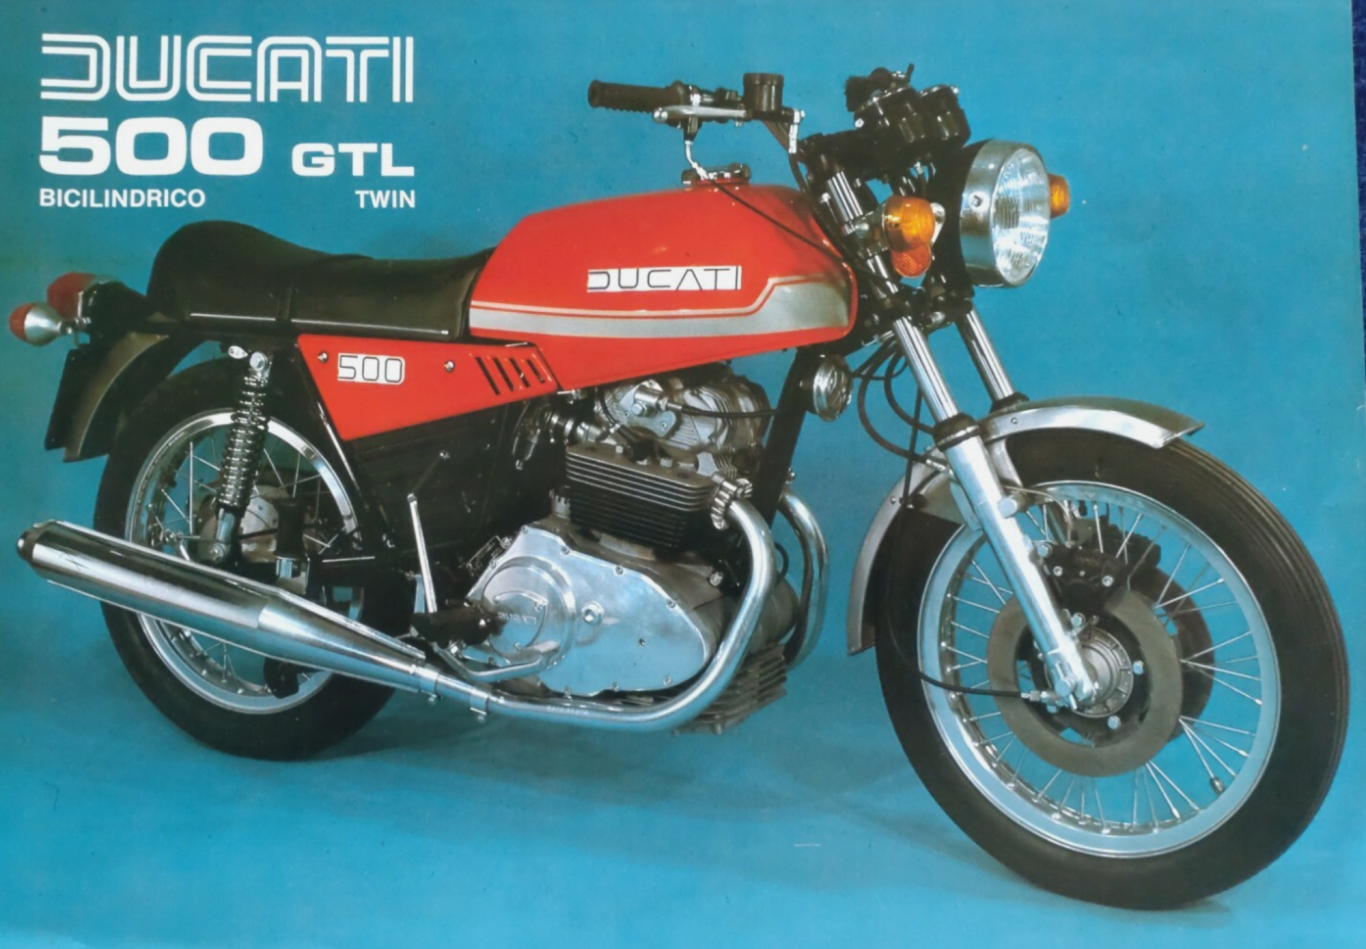
Now you have to admit you don't see many of these beauties around nowerdays, nor back in the day to be fair with only around 450 bikes made in 1977 worldwide and under 3000 units of the 500cc parallel twin engine ever produced for all models we think in this guise it could be a very rare bike indeed! So if not just for it's rarity value and obvious beauty we are delighted to have been able to acquire this example of what may be one of the least well known Ducati's and welcome her into our collection! This bike represented Ducati’s early attempt to crack the middleweight twin cylinder market however being designed under government ownership and produced during tough times for Ducati today it stands as one of the most controversial models in Ducati's outstanding history. This particular bike is not without considerable issues mind you, the throttle is rigid, parts of the switches are missing, indicators are missing, electrics are anyones guess, the headlight is shot, seat has been recovered, well actually, but the bolts to refit it are cut off flush, the tank is just "placed" not held, the front axle looks cross threaded, the painted frame is amateurish at best and although the bike looks sort of complete she is anything but. This one is going to be a real challenge for the Bores if indeed we take her on, she is drop dead gorgous so is she destined to be Bores "wall art"? Who knows, we certainly would make more off her stripped and sold for parts! So shall we just all enjoy her lines drawn in a time where Ducati had the feel of the bike, she was soft and not fantastic, plus the engine, underpowered and forgettable, all wrong but the looks, oh the looks never deserted them! Those stylish Italians, same today, it runs in their DNA.
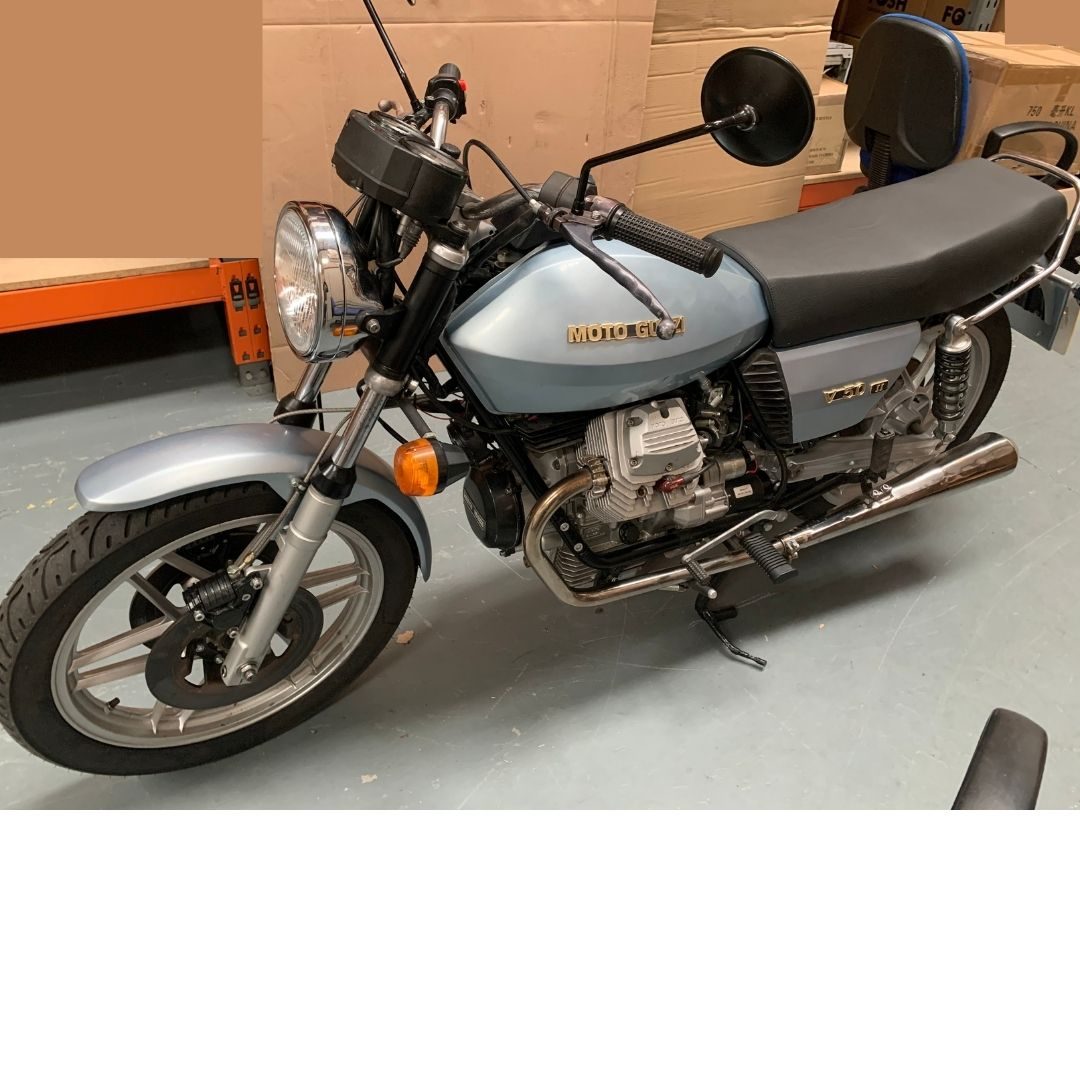
Our latest Moto Guzzi arrives!
I love it when new bikes arrive into the collection and this one certainly did not disappoint. We added this Moto Guzzi V50 Mark 11 to our collection because it captures everything we love about the era, a truly characterful V-twin engine with shaft drive simplicity and unmistakable Italian flair. It’s light, refined and offers another flavour to the parallel twins and inline fours it now sits beside. Not just a Guzzi this is a standout Guzzi from a golden age of middleweight innovation and we love it.
The vision?
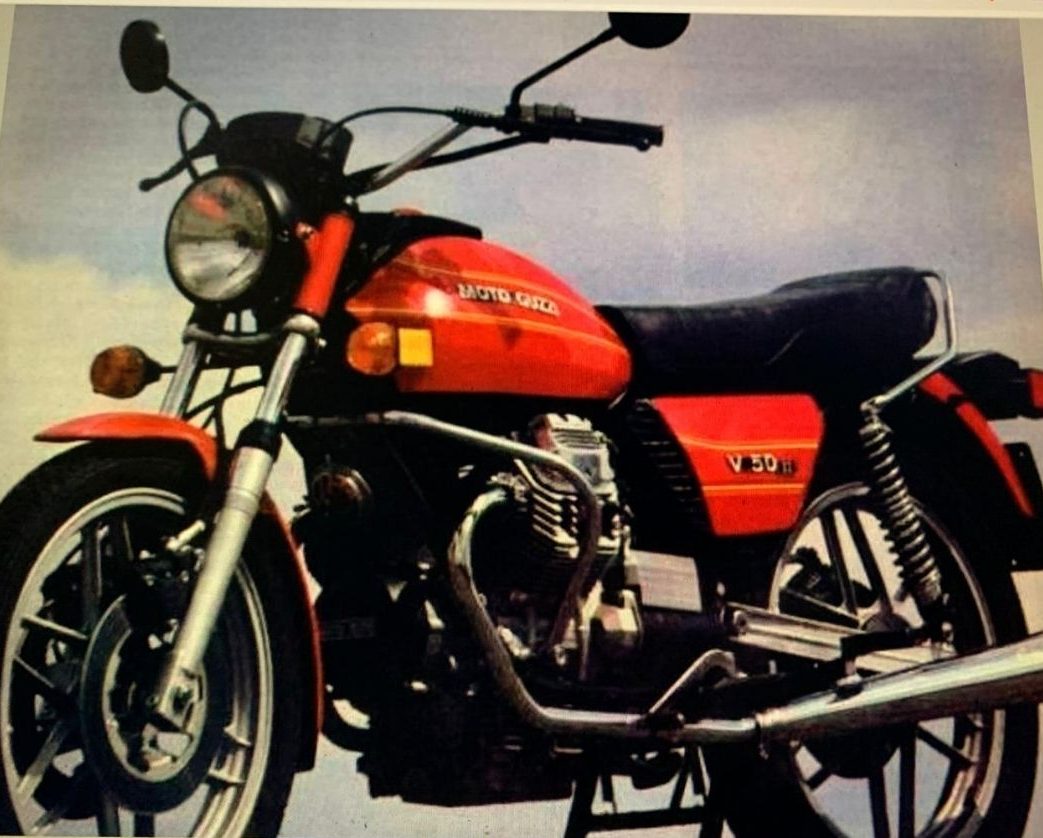
Well it is no small order but let's see if the Bores are up to it! If we can pull it off she may well be a real stunner, watch this space!
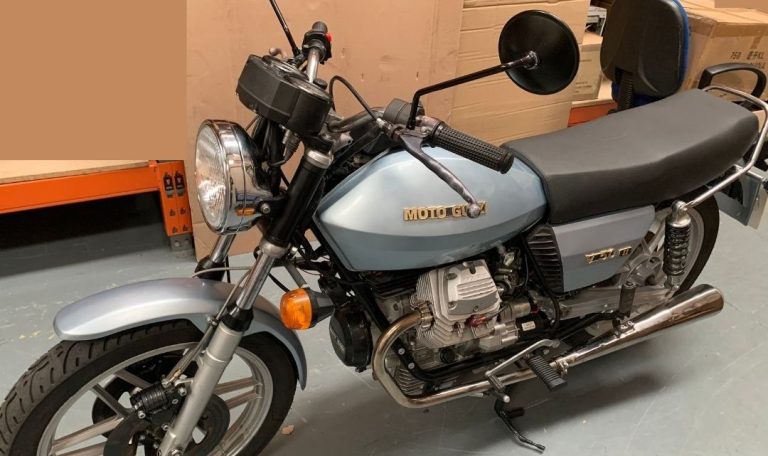
As she sits today:

We acquire a beautiful XS500C Ambitious, Underrated and Unapologetically '70s
These are rare beasts nowerdays and were very lucky to have found such a great example. Our thanks to Alan for a perfect sale :)
Our 1976 Yamaha XS500C marked a turning point in Yamaha’s attempt to bring modern engineering into the middleweight motorcycle class. Admittedly following teething issues with earlier models the '76 version was far more refined, more reliable and for its time technically quite impressive.
At the heart of the bike is a 498cc DOHC parallel twin engine fitted with four valves per cylinder, a rarity in 1976 and a clear sign Yamaha wanted to push boundaries. This was paired with a 6-speed gearbox and with it's high revving engine it delivered its best performance when you kept her awake. She was no racer but with a competent rider on board she could be tough to pass with her high stance and nimble physique causing more "race bred" models some problems.
On this model you're wise not to buy pre '76 with the technical issues benefitting from several improvements over earlier models namely revised camchain tensioning, better carburettors and stronger head gaskets all aimed at solving reliability issues that plagued the 1973–75 models. Widely considered the most sorted and rideable of the XS500 family was our year and onwards.
On the road she handles with surprising agility. The frame setup, remember this was in the 70's, is fairly predictable and dare we say offers a degree of confidence on the road. That said it’s no lightweight at just under 200kg wet but it wears its weight low and responds well to the competent rider. Braking is handled by a single front disc and a rear drum standard for the time and quite effective, she is fitted with a twin front optional fitting point if needed.
The old girl was never as smooth as the 4 cylinder Hondas and can buzz a bit at speeds, still this is part of her undoubted character for sure.
Visually the fuel tank borrows from the RD although feels thinner, as does the seat in design, strangely feeling wider, the side covers look bang on period and there's just enough chrome to make it sparkle. The rear end was more "plasticky" than most chrome versions as with the front mudguard but this did always endear me to her when I was 17.
This is a rare and under appreciated gem in my view with values remaining affordable, parts are available in the typical places and when well sorted offers a unique mix of 70s charm and surprising performance.
We have a great piece of Yamaha history, just unusual enough to turn heads whilst still capable enough to keep you smiling.
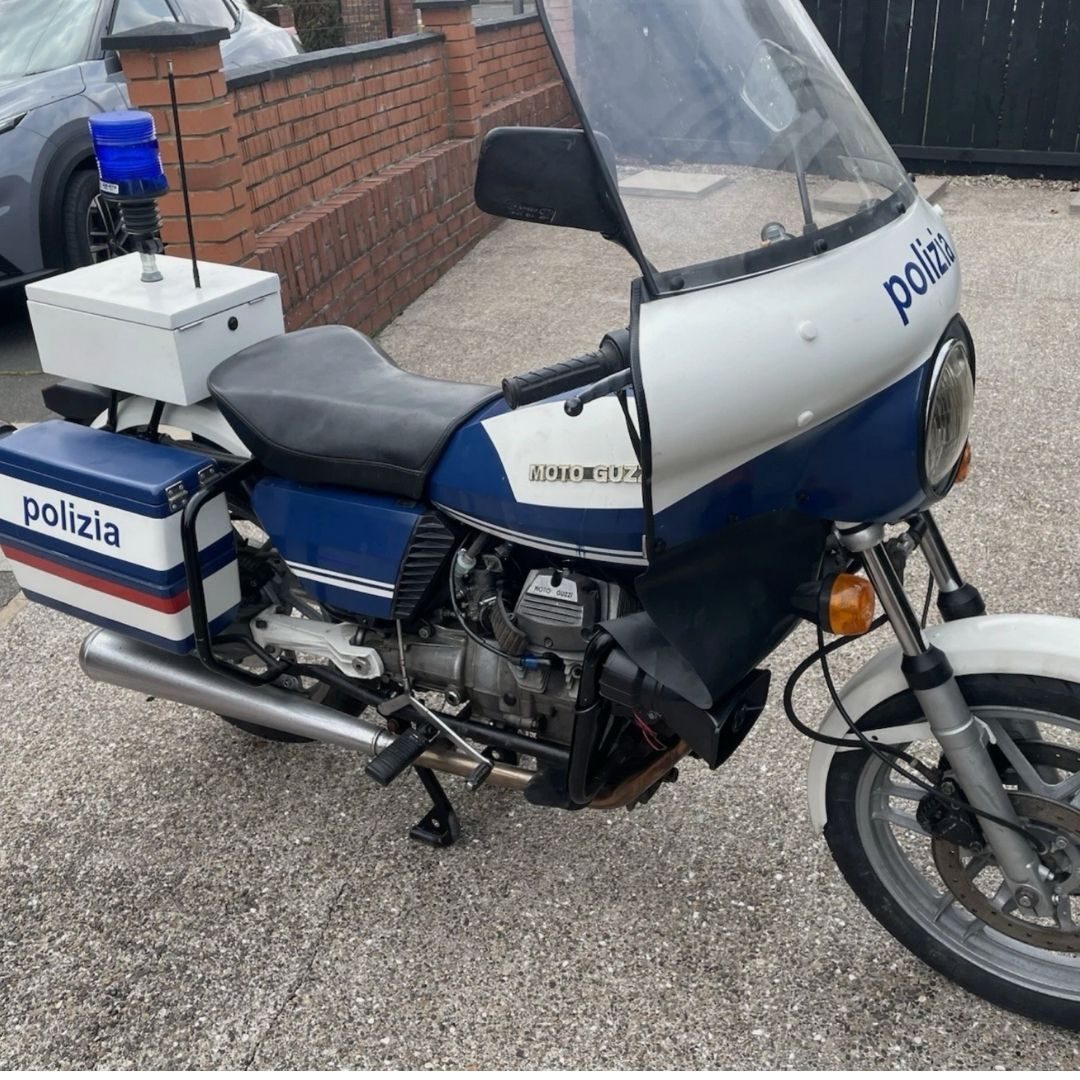
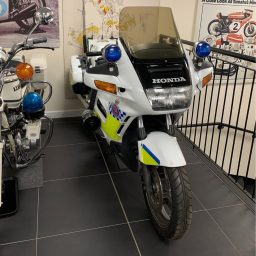
I love the originality of this bike, she is a real showpiece, the sirens really sound like the Italian police, probably because they really are! I think we may just keep her like this, who knew!
The Bores get lucky with a Moto Guzzi V50
The reason we collect mid weight bikes of the period is the 750, 850, 900's not to mention the 1000+ cc's and up-over models were quite simply too heavy. Now this to us is obvious but in Italy during the late 70's early 80's the Police had exactly the same problems especially with the tight roads in the towns they enjoy so moving down in size to the more nimble 500cc Moto Guzzi V50 was a simple enough decision. We think this really marks out why we collect this range of motocycles and also gives us a wonderful piece of history for the collection. This bike is from the actual Italian Police and retains all of it's features whilst underneath of course being a superb example of Moto Guzzi's beautiful V50. Needing the bores to bring her back to her full potential we will have ourselves a little gem which will be admired for years to come. How many times will you be able to set real police alarms off? Well one of the bores thinks he cannot set them off enough! He knows who he is :)
We need a few cups of tea whilst considering our Moto Morini, is it a full nut and bolt rebuild? Has to be.
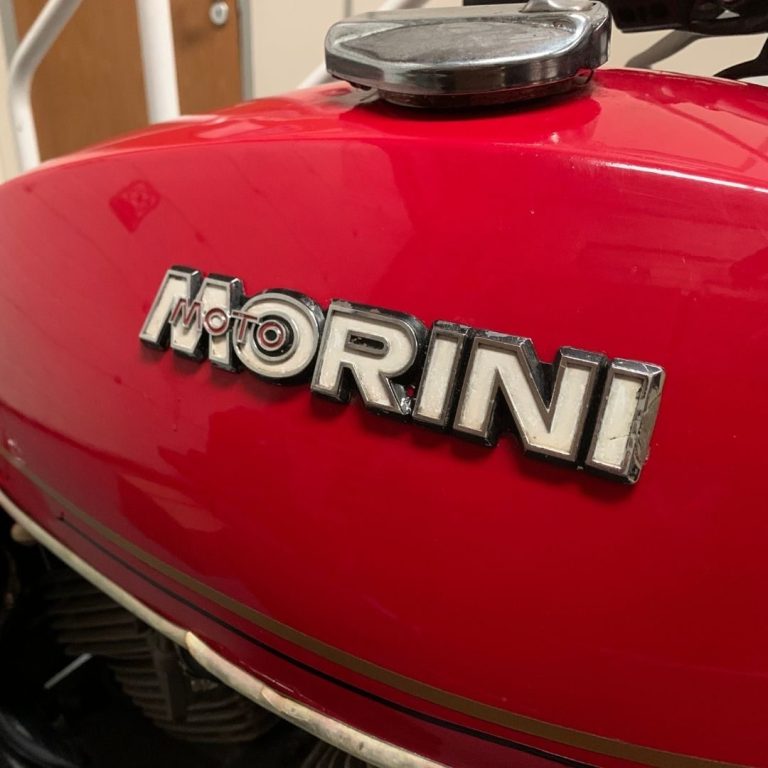
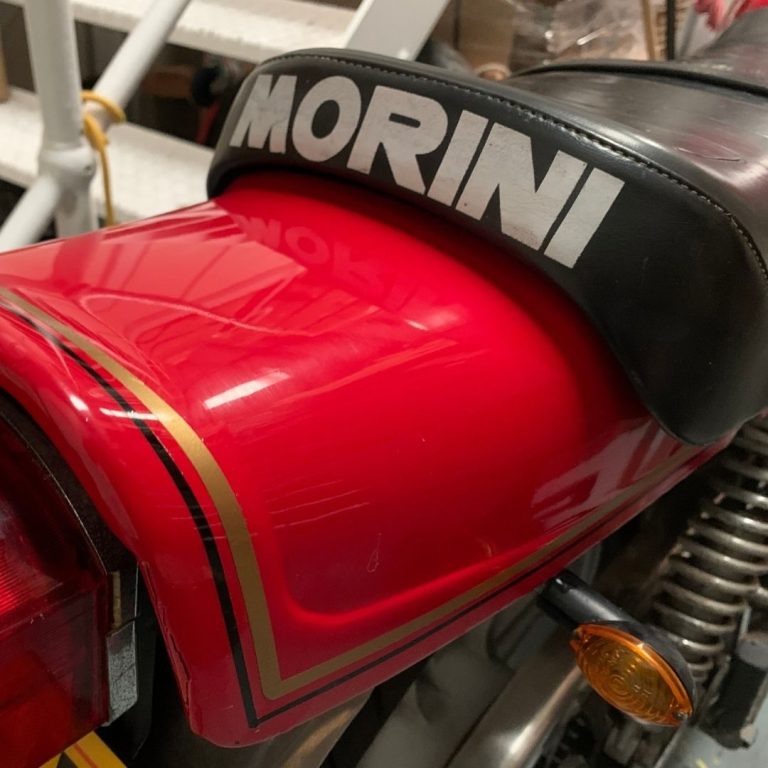
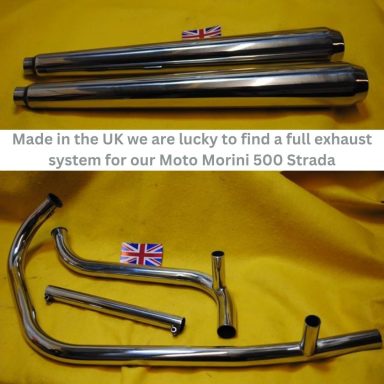
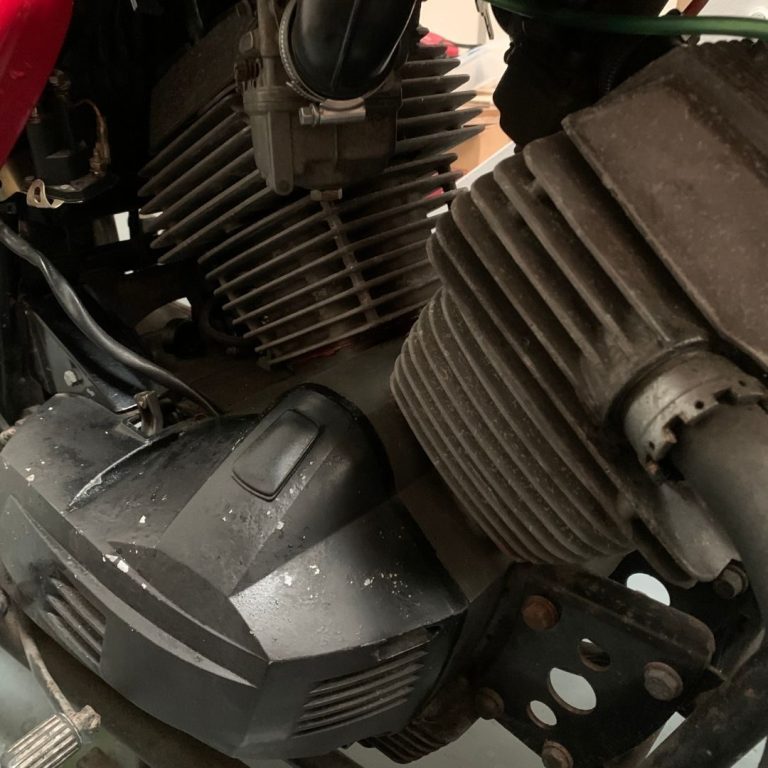
Our 1979 Moto Morini 500 Strada was a technically distinctive Italian middleweight motorcycle back in the day known for it's innovative engineering and Italian style. At the core was it's unique 72° V-twin air-cooled engine developed by Franco Lambertini which was no small part of the USP Moto Morini brought to market. Displacing 478cc with Heron style heads and a flat combustion chamber design that improved fuel efficiency and manufacturing, and before you ask the combustion occurred in a rebated piston design unseen in motorcycles until then, she produced 43 horsepower at 8,500 rpm. This was paired to a 5 speed gearbox on this model, soon to change to 6, but still notable for its compact design and smooth shifting. The engine featured a toothed belt camshaft drive, a rarity at the time, reducing mechanical noise and maintenance. The Strada used electronic ignition, Dell’Orto carburettors and a dry clutch giving it a race bred feel. Its frame sadly was a lightweight tubular steel double cradle which was a bit bendy but when fitted with Marzocchi suspension and Grimeca brakes it offered reasonable handling for the day with strong stopping power through the twin discs up front. The bike’s agility, reliability and unique technical features made it a standout bike in late 70s that was if you were lucky enough to see one in my part of town, Westgate Hill in Newcastle, as they were in the region of 25% more expensive on the forecourt than the popular and very capable Japanese alternatives! So far we have received a new set of exhausts and a full engine gasket set, for now she is going to stay where she is until the right Autumn where we decide to strip her down, cannot wait!
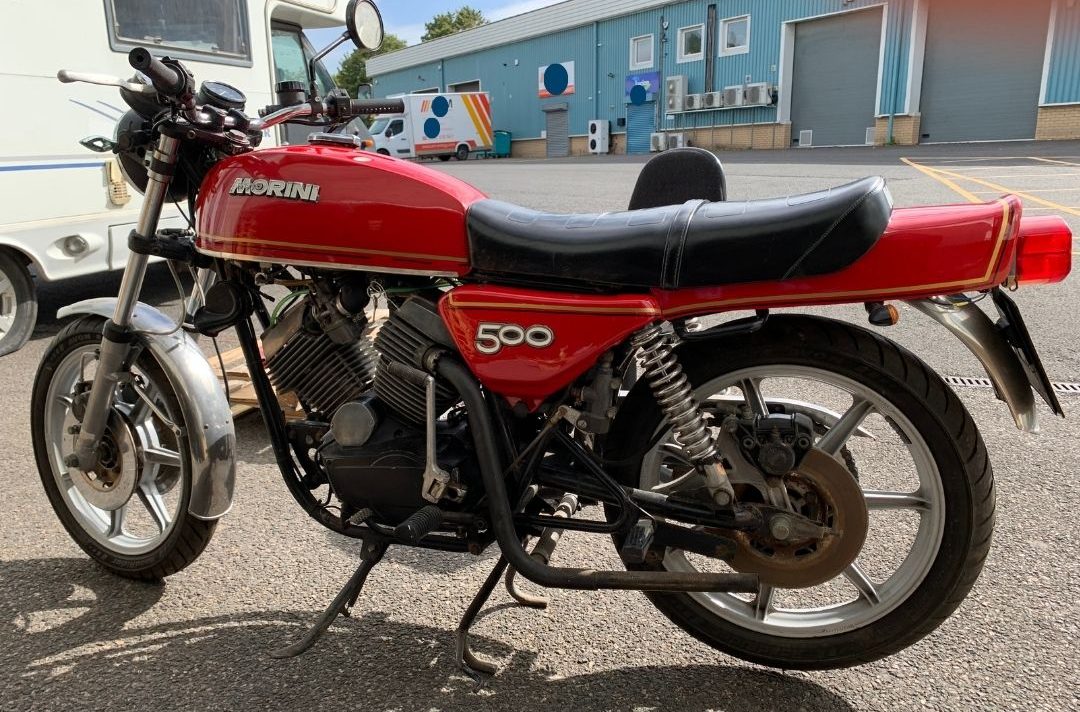
There's beauty in them there hills!
It is an acquired taste admitidly but the Moto Morini was quite the high end of design way back when.

The Yamaha XS500 starts to come apart and looks immediately better for it!
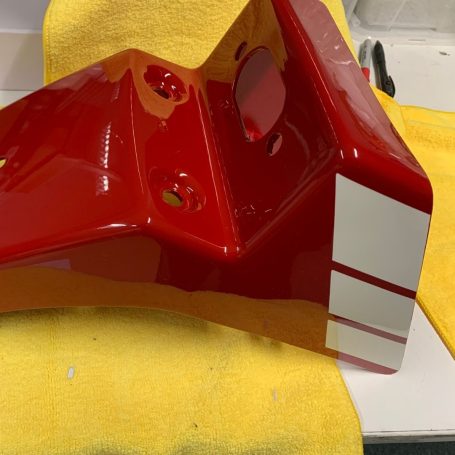
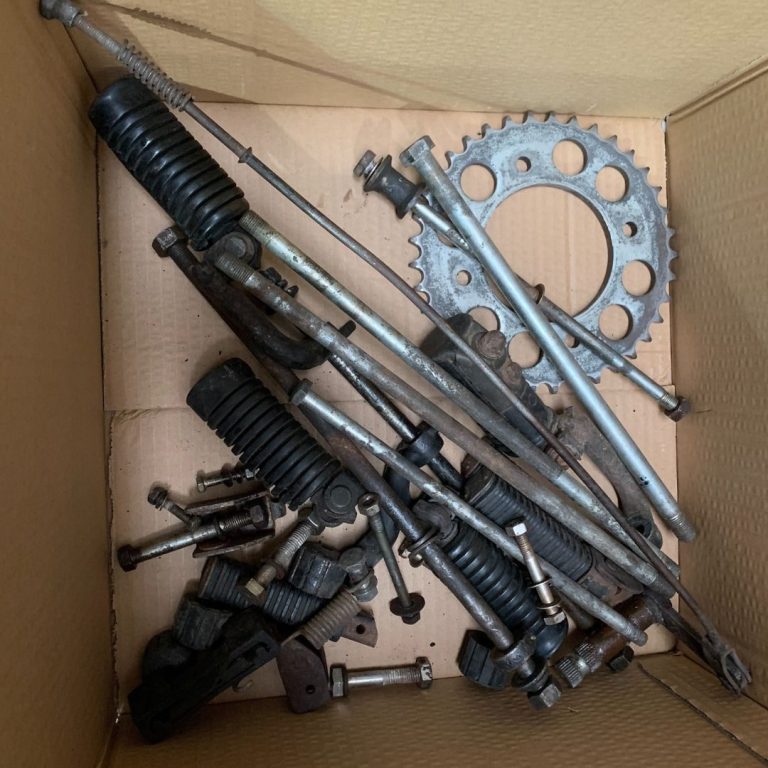
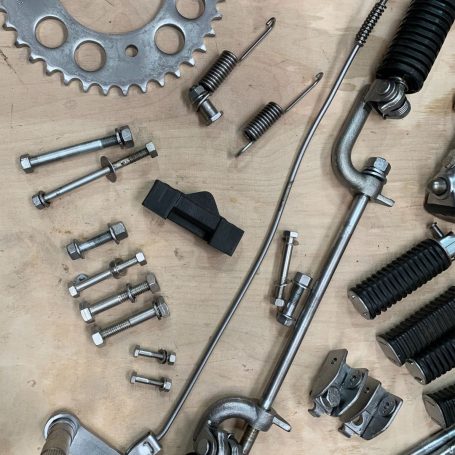
We start the job of painstakingly taking every nut and bolt, rear pegs, axles etc off for the zinc platers. We have agreed a paint job to go Red and white decals, a new supplier to the bores so we will see what there like before we say too much but they sound very good.
The Yamaha XS500 starts to look more original with a couple of replacement parts. The seat was delivered to Saddlecraft who recognised the pattern immediately as the same on an RD and will undoubtedly have it looking like new in no time!
We were lucky finding a set of period style mufflers for her from the 'Classic Bike Shop' which have been snapped up as one of the hardest parts to find currently.
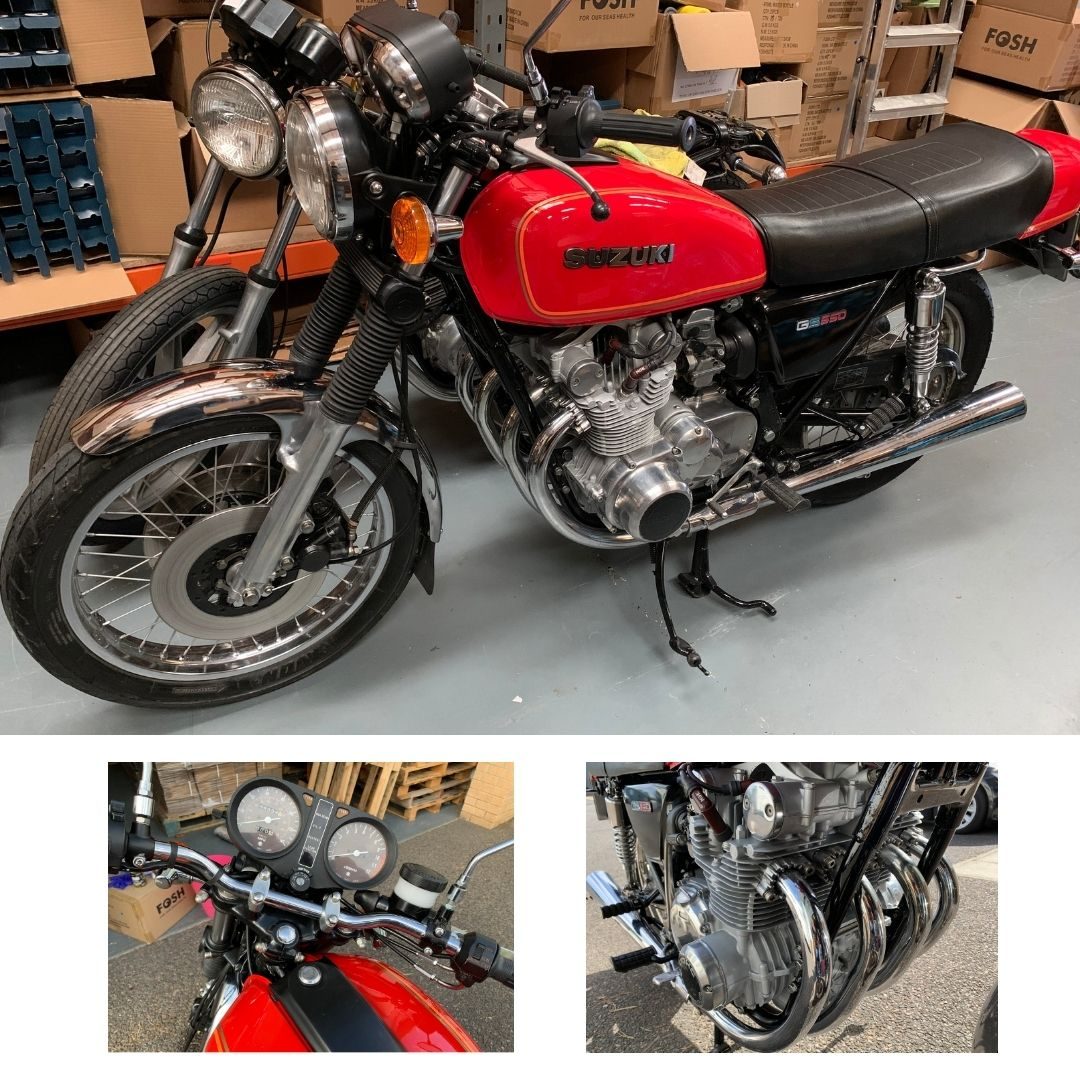
We are extremely lucky to have been able to acquire this "almost" show quality Suzuki GS550 (may not get any prizes but would stand it's ground)
She came to us with a tank that we worried may need a full repaint but after a few hours with ultra fine paste and a machine mop then a heavy gauge clay bar was applied and the end result was the colour popped out and the finish is as it should be. The rest of the bike was in excellent condition, she will need her carbs balancing I think but other than that just look at her, a beauty!
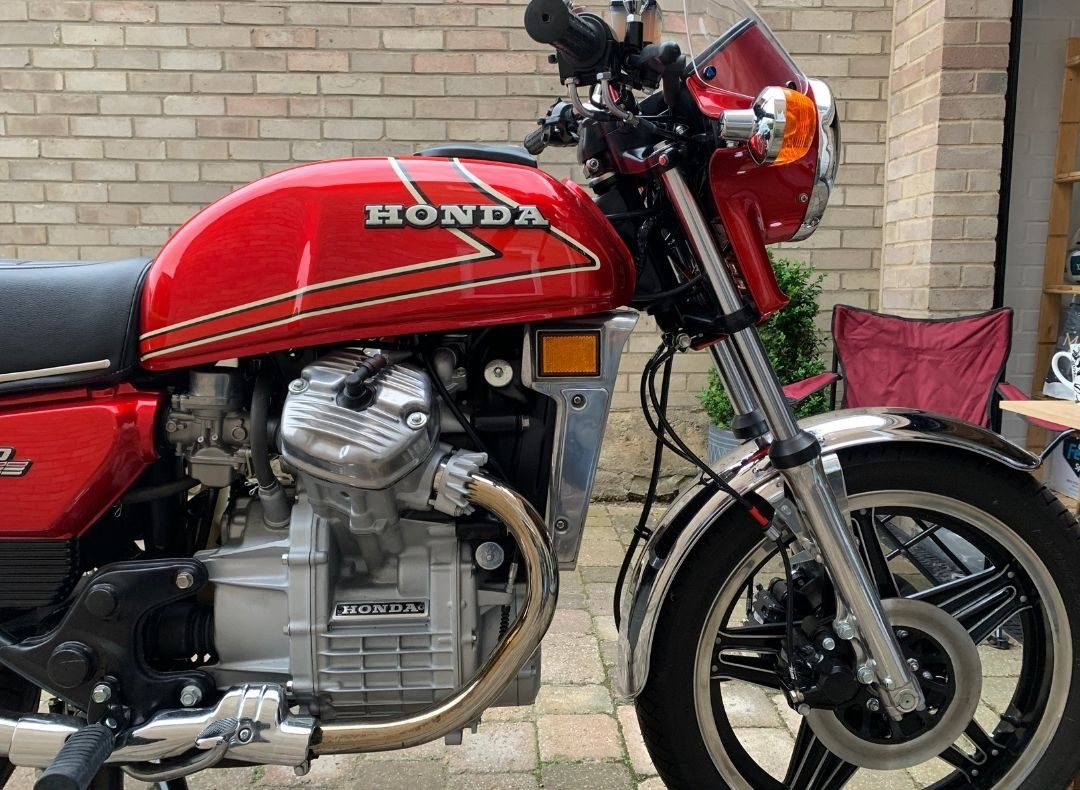
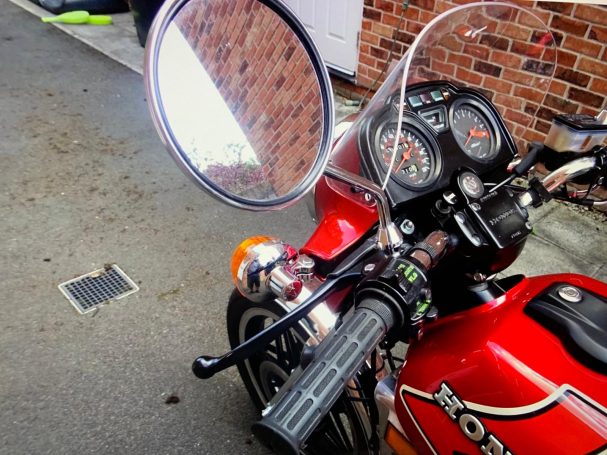
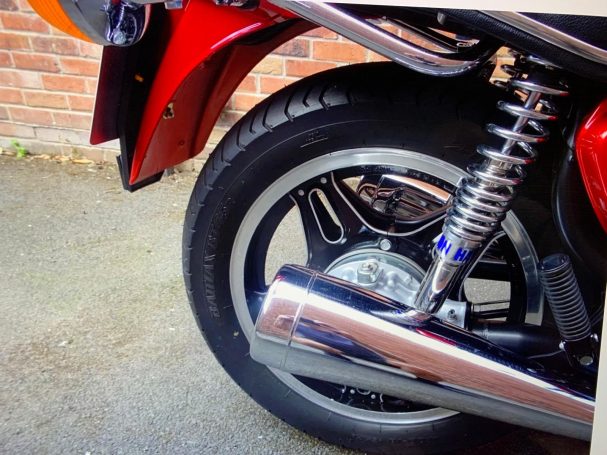

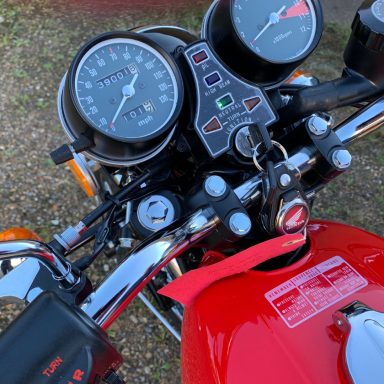
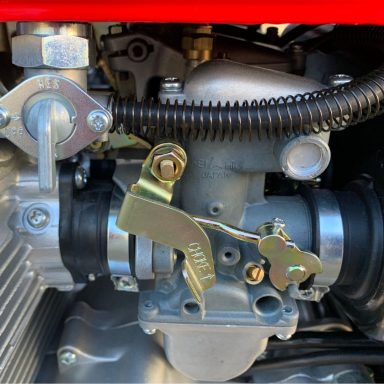
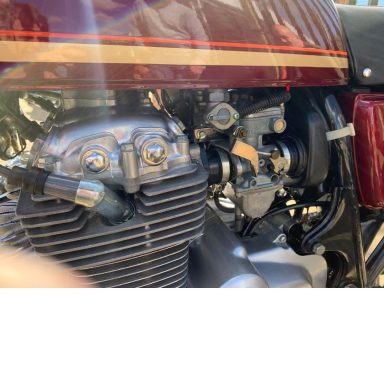
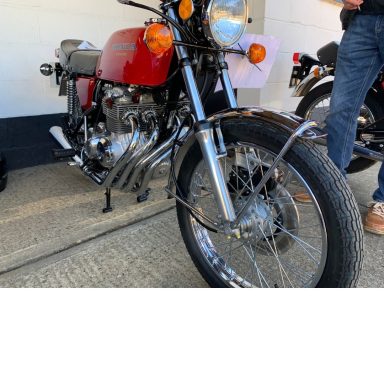
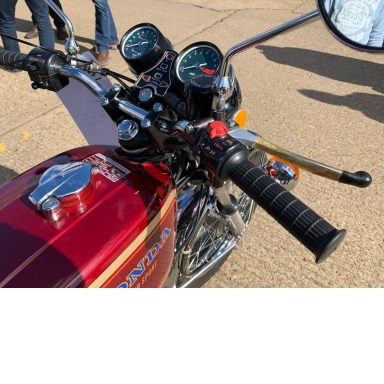
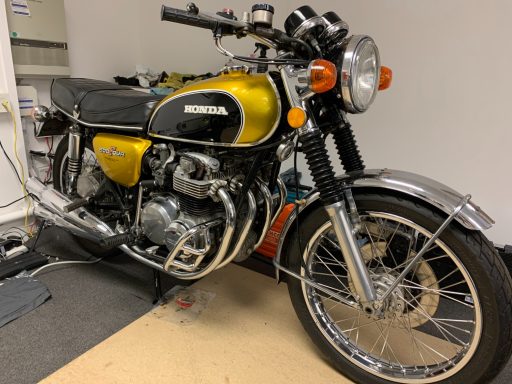
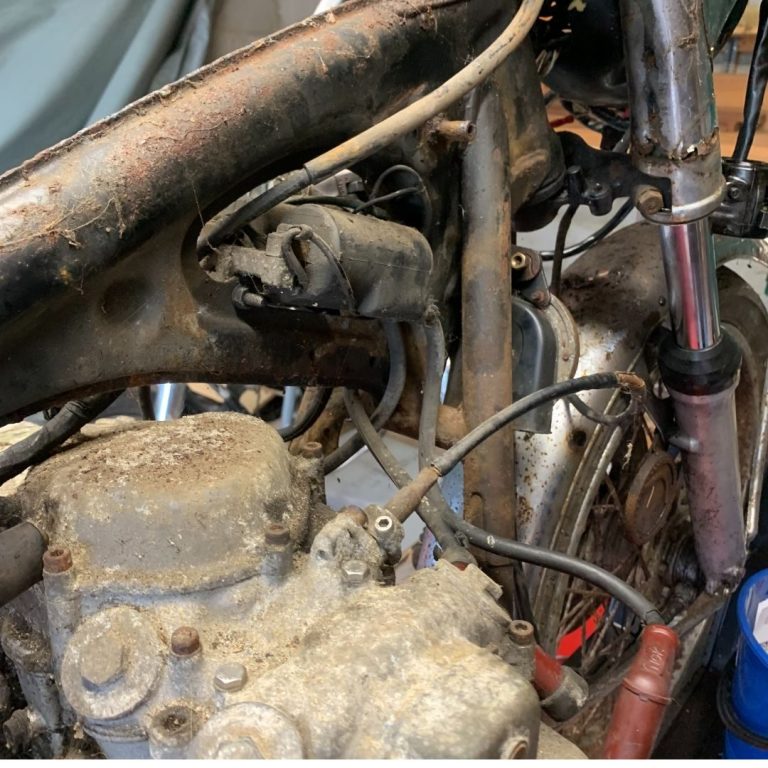
We say hello to "Rhonda" our red honda CX, the bike that we all remember so well, for different reasons shall we say, the Honda CX500!
We all just see that bike and think what a bargain it is, well here it is for real! An amazing CX500 and she has certainly got better with age! Absolutely amazing machine, a time warp back 40 odd years and still looks beautiful. What a find and one that will draw a crowd for years to come.
New stock, a tatty but basically ok Yamaha XS500!
The 1978 Yamaha XS500 was a technically advanced middleweight motorcycle that featured a 498cc DOHC parallel twin engine, five valves per cylinder, a six-speed gearbox, and front disc brakes which were cutting-edge features for its time. Yamaha aimed to combine smooth performance with modern engineering and the bike did offer a comfortable agile ride. However, the XS500 was plagued by reliability issues, particularly with cam chain tensioners, valve guides, and carburettors which limited its commercial success. Despite these shortcomings the XS500 has earned recognition for its innovation and distinctive character. Today it is appreciated by collectors and vintage enthusiasts as a bold, if flawed, example of Yamaha’s willingness to push design boundaries in the late 1970s. With its angular styling, relatively light weight and unique engineering the XS500 remains an intriguing option for those seeking a less common classic from Japan’s golden era of motorcycle development.
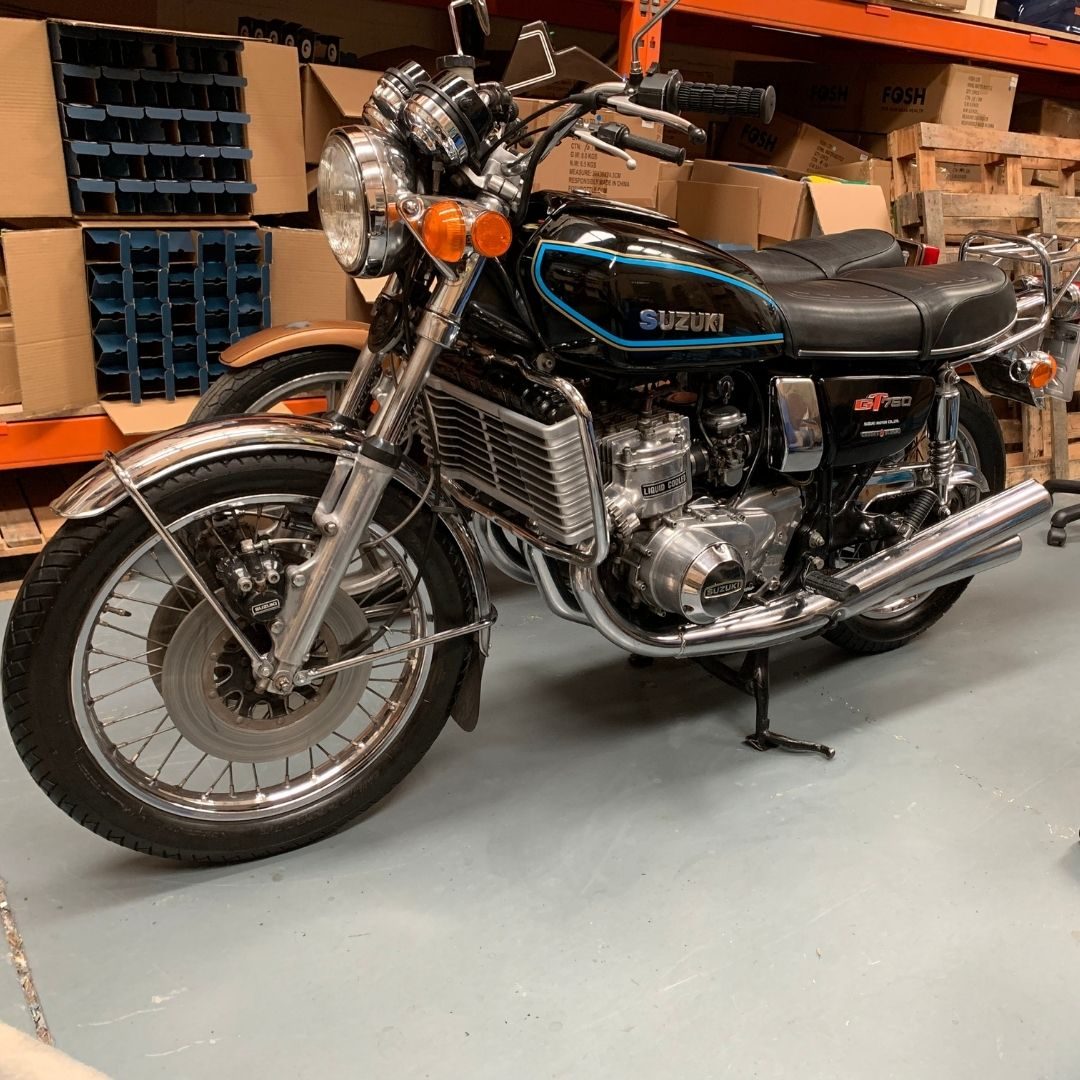
We are delighted with our very tidy Suzuki GT750 Kettle!
Sometimes in life you see something and just rush head long in, well this is no exception! Bought on a rush of blood the bike is really an unbelievable thing to be up close to. Start her up and she snarls and gurgles at you as if she is saying I have absolutely no 2025 health and safety bollocks, come and ride me and I will show you what I mean! Sharing a lot of the characteristics of Father Jack Hackett of "Father Ted's" fame I think if she could talk it would include Drink Feck, Arse and Girls, oh and yes, she dribbles!
Untamed raw and utterly beguiling!

Perfect day for a run out!
Both bikes and riders were loving the summer heat last weekend, the old bikes had a lovely run around Northumberland, not too far as Vanquish had compression issues, she will go on the ramp shortly and it turns out she had a broken piston ring. Still a lovely day!
We take on a Esmerelda's Main Board
Part 1
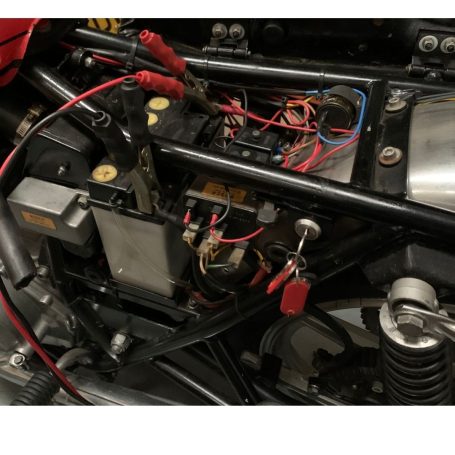
We take on the central board of our latest project CB500/4 Esmerelda, we are going to strip it right down, refinish where possible, replace where necessary and rebuild. The unit consists of a back plate which carries the rectifier, regulator, main fuse, indicator relay, starter electro magnetic switch an area where the wiring harness makes it’s main connections.
A brief description of these parts the rectifier converts the AC current from the alternator into DC, the regulator regulating the current to the battery. The main fuse is located in an inline fuse box, the indicator relay is a more simple device than it appears, a simple current creates a magnet field drawing an inner switch towards it and when the circuit is made and it cancels the magnetic field so it drops away, hence the clicking you can hear when operational. The electro magnetic switch allows the battery to send its full power to the starter motor without going through the harness, the switch is activated by a positive charge being created once the starter button is pressed, this action then creates a current which in turn activates the electro magnet switch which connects the main cable from the battery to the starter motor, this is is a positive wire being earthed out through the engine via the starter motors own unit completing the circuit as it in turn comes alive and rotates.
Now we know what we are working with you will be able to locate the wires in the wiring diagram, once cleaned of course.
It is worth a couple of days before you want to do this job set the item on a plastic bag and liberally apply penetrating fluid to give the bolts the best chance of releasing easy. It is also useful to pop some fluid where the rubber mounts are on the board, these will come off easier with a bit of assistance.
Start by gently pricing open the two wire brackets which are part of the base, use long nose pliers to ease them enough to release the wires. Then remove the rectifier, two bolts hold it in place, remove and disconnect the three wires. Then move on to the indicator relay, remove the two wires noting the location nd slide the unit out of its rubber mount. Next remove the electro magnetic switch and remove all rubber parts. Next remove the regulator with a single nut fixing it to the base.
Fully dismantle the board, be aware of the steel bushes used in the rubber mounts, these allow the unit to be bolted in place whilst damping the unit and should easily come free. The rubber gaskets are old so take your time but will pop out with a bit of effort.
Once the item is fully dismantled you can start the cleaning process, the wires will have years of grime on them but also be very oily and this will be your friend as they clean up amazingly well. Use a good degreaser and an old tooth brush with some tissue and bit by bit take the oily debris away, this takes a bit of care as the wires are close, a twist of the harness allows the wires to open up, some new black electrical tape over areas the old tape has lost it’s adhesion and you’re on your way.
The base board may look rough now but a trip to your local powder coater and this will be as good as new, the rubber holders and gromets we find come out well after vapour blasting, put them in with a load to keep the price down. Our rectifier was replaced as we found a fairly clean one on Ebay, the starter solenoid (electro magnetic switch) was good and the indicator relay was in amazing clean condition so we can reuse it. The main cable from the battery again was pretty good, a clean and reuse it.
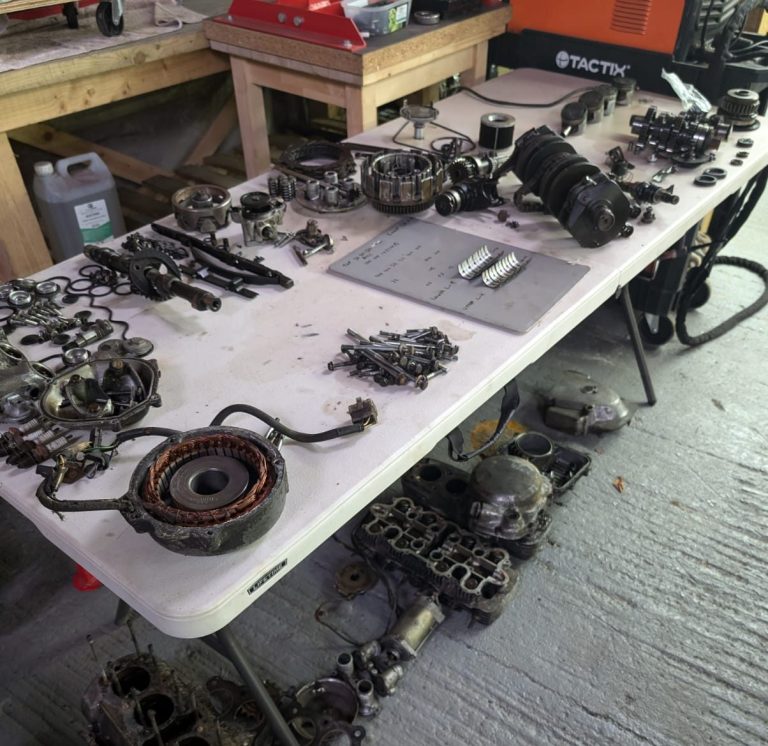
Once the parts return from their various specialists it is reassemble time.
Some images of the job so far


Still early days but the shape is all Honda
Our newest acquisition ... Bruno!

Not at all bad for 47 years!
Project shots as we dig into this beauty
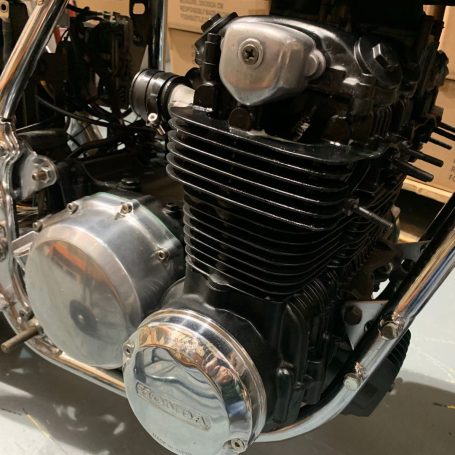
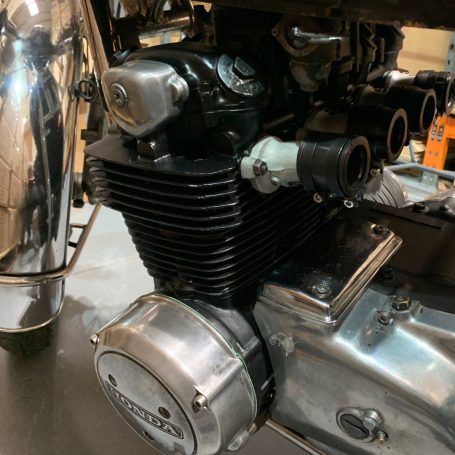
This engine should be just the ticket for the Cafe Racer with the look we are going for.


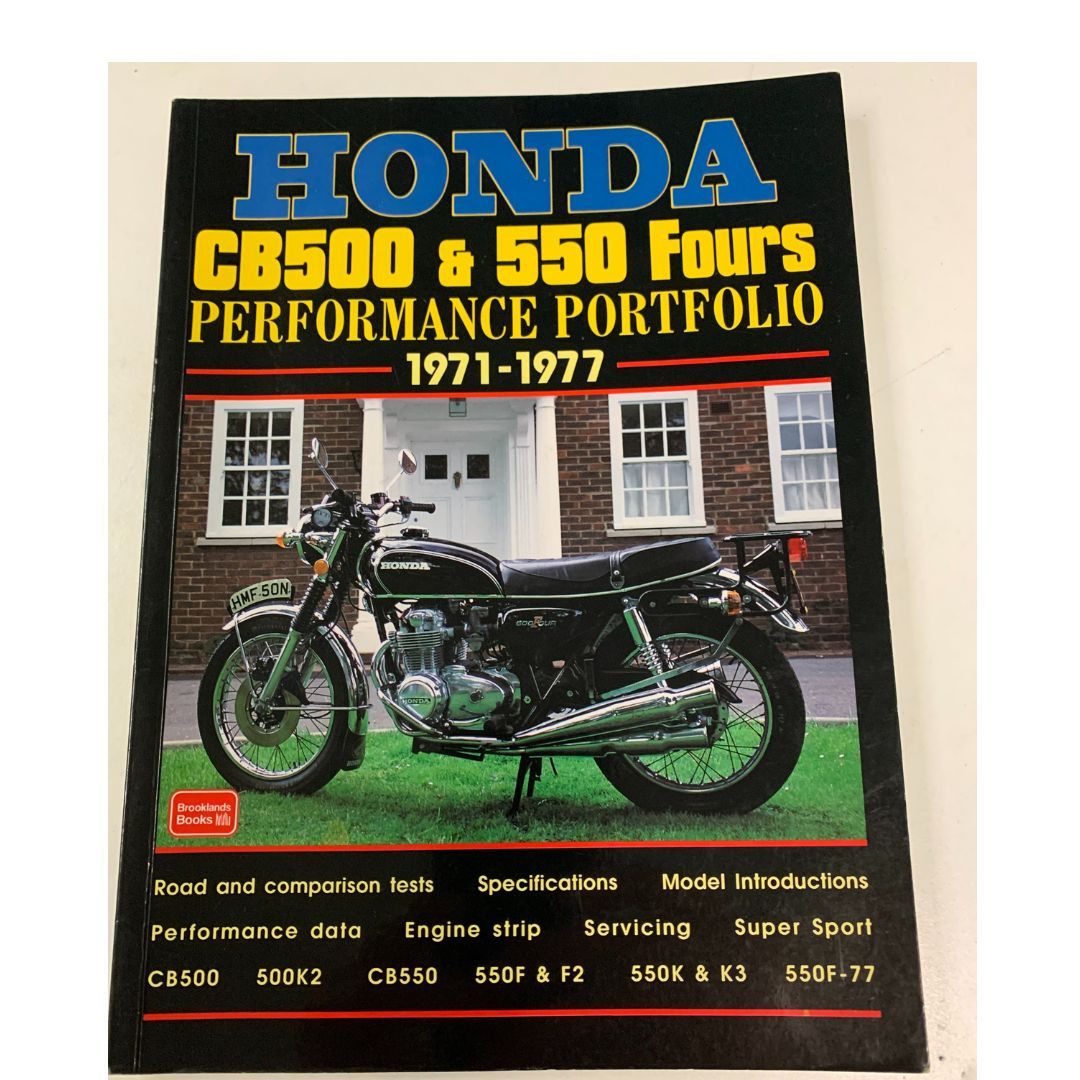
Many thanks to Brian for this amazing encyclopedia almost of the CB500/4
This publication covers an in depth analysis of the bikes in the various offerings. A really interesting engine rebuild section is daunting but available. One for the resource shelf!
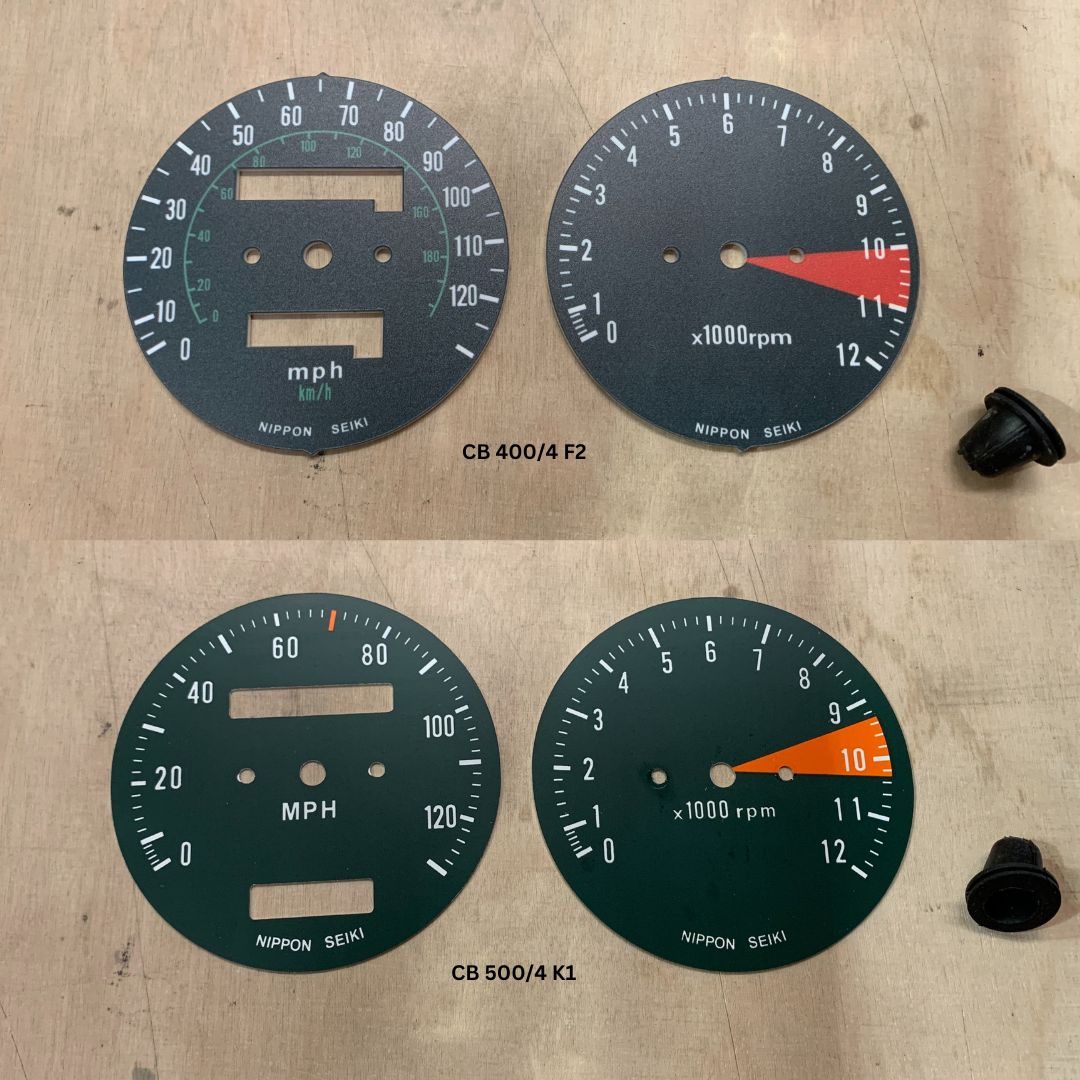
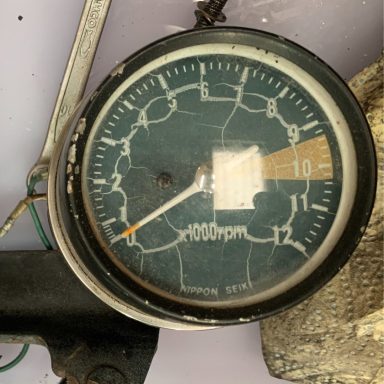
Our new dials arrive and they look good!
The dials have arrived and on first inspection they look really good. Unlike previous ones we have bought these are on thick plastic or aluminium bases so replacements rather than stick on upgrades. We will see on the build if this is better but it would appear so. A good idea is to also buy new grommets, this supplier had them available so it was a no brainer.
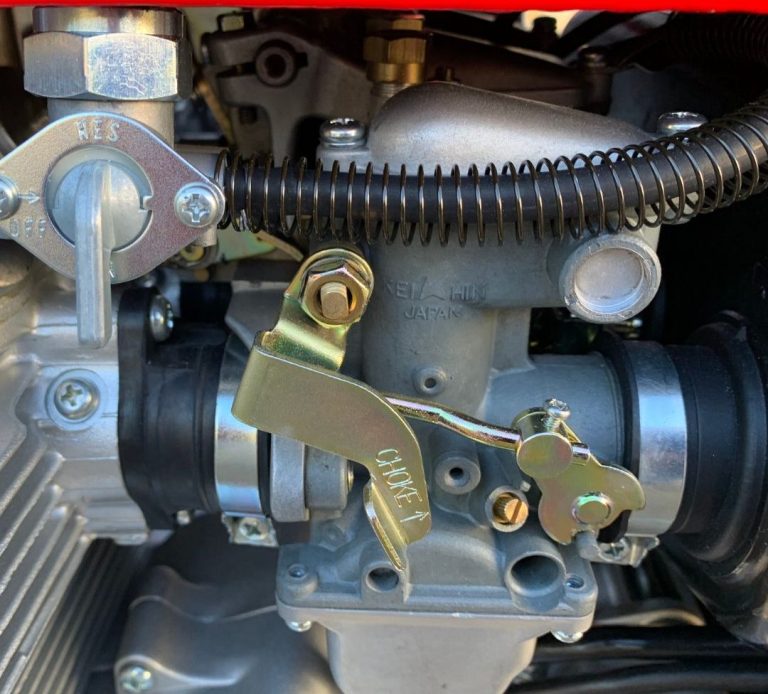
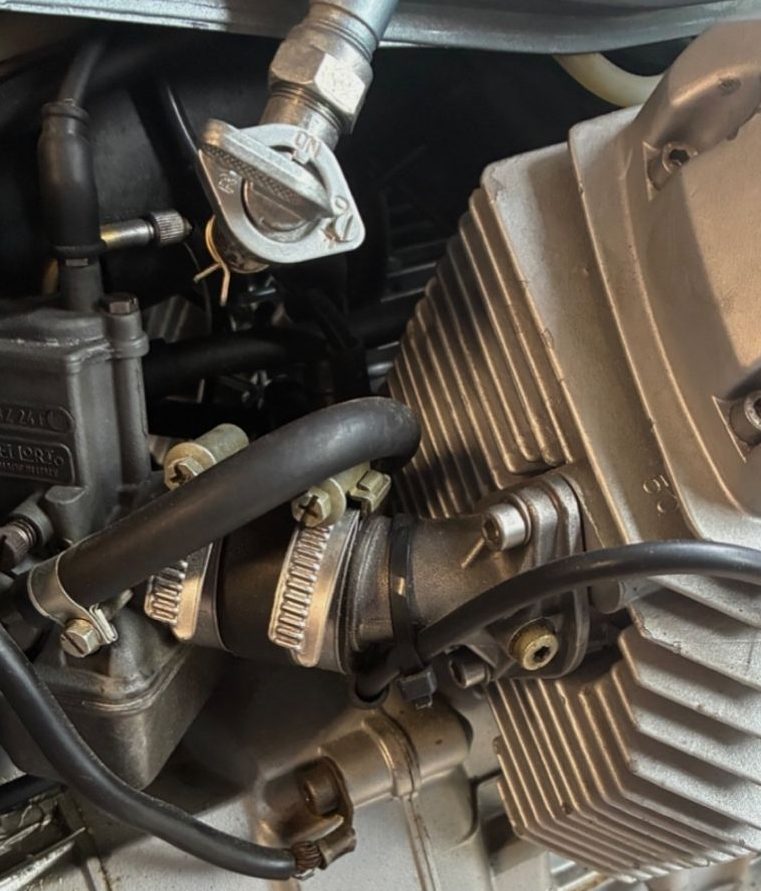
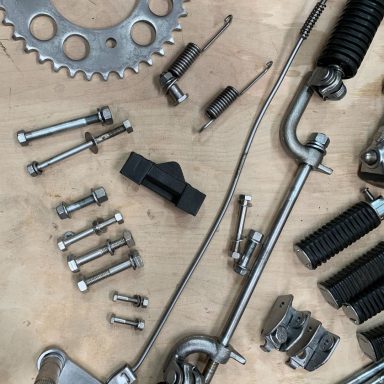
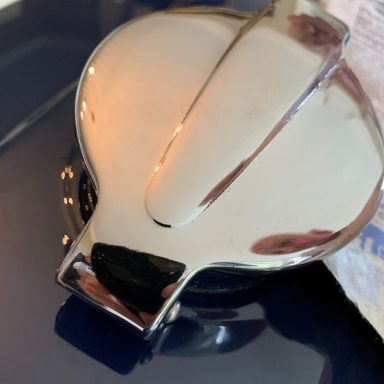
30 seconds about zinc.
We thought we needed a good zinc plater but what are the parameters to build a good working relationship
In this hobby finish is all important and to get that nut and bolt look you need zinc. For instance the choke levers are all yellow zinc which is a passivate, the bolts are a simple electro-deposited coating which as long as the parts are clean will look right. If your building a cafe racer the black options could be perfect again a passivation. The passivation process is a secondary process that can change the finish appearance and improve its durability, these include yellow/gold as shown on the choke, clear, chrome-free and black as shown on the fuel pipe protector. We have seen resistance from commercial operations to us bike builders as we bring in a bucket of rusty, oily and not to put too fine a point on it nasty products fully expecting them to magically wave a wand, a wand they have got, for very little money and return us a pristine set of product. We suggest you take a moment and think how best to approach these companies, remember there are others who follow us and will suffer the wrath of our ways. Getting the items vapour blasted (see suppliers) before you get to the platers is expensive but a really good way to show good faith, trust me they will be more likely to respond to your requests as it becomes a far easier task. A lot of zinc platers have blast facilities but we certainly think a bit of thought by us goes a long way here and builds a platform for us to use all in the years to come.
CB500/4's currently in the "to do" shed
From the left our Candy Garnet Brown, Bucchus Olive Green, Black and Candy Starlight Gold bikes


Our visit to David Silver's CB400/4 day was amazing!
We were blessed with perfect weather for the day which lifted the event even more, if that was possible, as 400/4's literally poured into the car park. The band played and the people mingled, we will post a full update later but for now we thank David Silver for his efforts to create such an amazing day.


How far is too far?
We start to ask ourselves the question what we really have to do when we start a project and what lengths do we need to go to to get what we want? Indeed what are the perameters of the job, are we creating a "concours" show bike never to be ridden, just showed? Are we creating a useable classic? Are we looking to sell on and if so what are our cost restrictions as to the project?
It's more difficult than you think to asses the level of rebuild we are going to achieve, obviously we want something as good as we can get, that is the hobby but to go 100% will cost more than you will ever recover and that does sting slightly. So you always end up with some sort of a compromise, if not you will end up having a full engine overhaul and top end seal rebuild, sometimes you cannot avoid that but not always, then you are never going to get the electrics back to new so it is a new full harness, then the chrome and trust me there is a world of financial pain where chrome is concerned and the list just keeps on going.
Now, let's get this right I am not saying going "all in" is a bad idea but I am saying you need deep pockets to achieve a concours example and you will need to accept a financial loss at the end of the build, if your looking to reward yourself for your trouble your onto a loser I am afraid.
But to fully appreciate the levels of restoration you can go to a full 100% nut and bolt rebuild is the only way, other than this you will have a job on all the time, new zinc here, new chrome there, and the bike will always be wanting.
The decision is yours but be fully aware of the outcome, it is better to agree in your mind what you are doing and maybe more importantly why? The journey will find its own path once you determine the stop your getting off at, or indeed the end of the line so to speak.
Whatever you decide we wish you well with your build, they are at times infuriating, at times exhilarating and always fun, just be sure you know what your letting yourself in for right up front, some people will ask you over your life for a commitment that they really have no intention of honouring, in this game you have no choice, maybe people who ruin others lives by their actions should also think about what they want before asking massive questions but maybe that's another topic for another day?
For me I feel to create as new as possible an example is the only real way to do justice to your passion, costly? Yes, difficult? Absolutely, worth it? You bet!
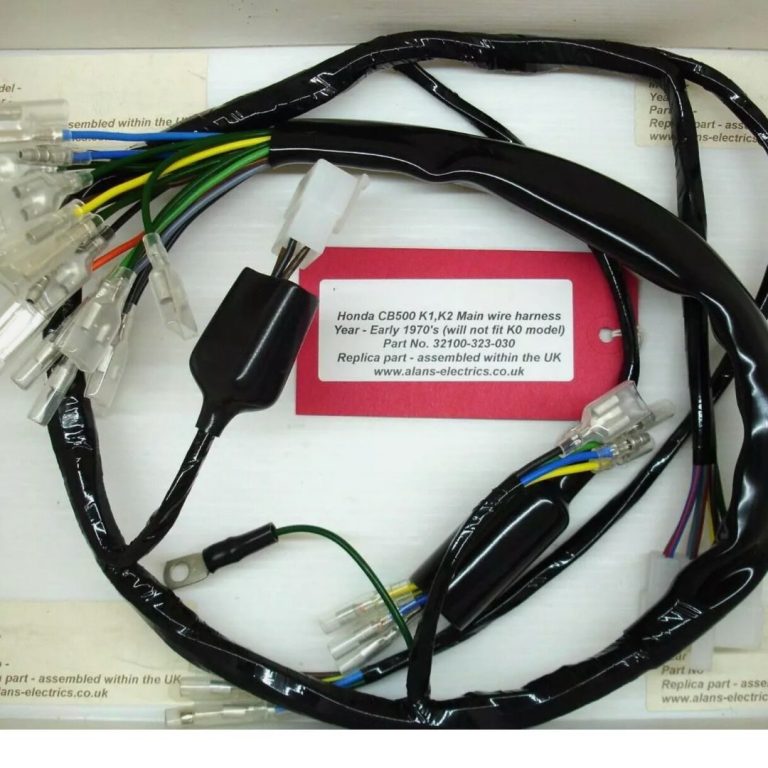
Esmerelda gets a new wiring harness
It is important to set a target when setting out on any project as they can run away with you if your not careful. That said we have always suggested Esmerelda would go full nut and bolt without actually saying the words, we can all understand that can we not! Well now we have acquired a brand new harness this takes us one step closer to this exciting project and, we hope, gets us over a major headache of any build, the electrics! We will keep you up to date as time passes but whatever happens she is going to be special!
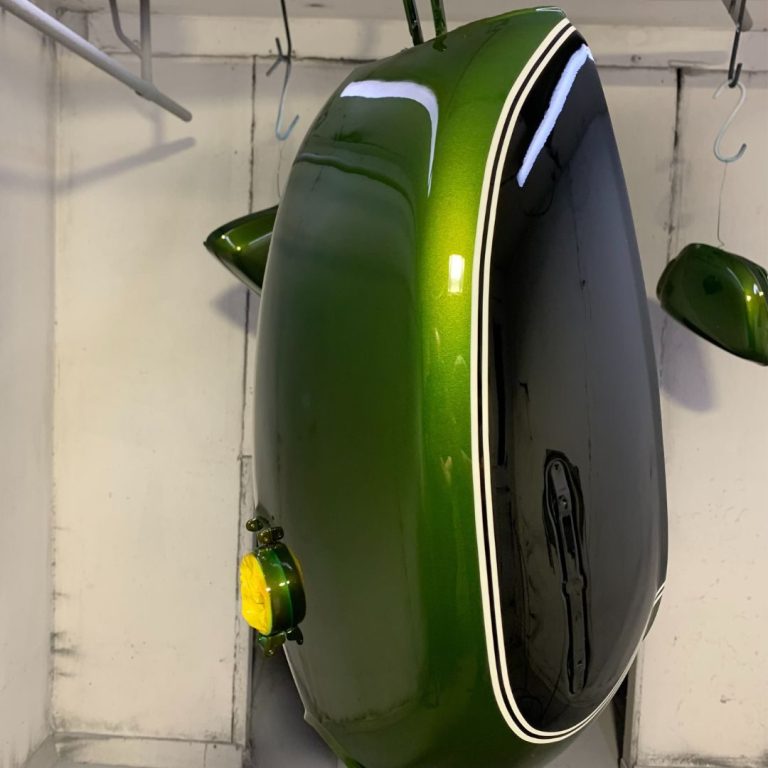
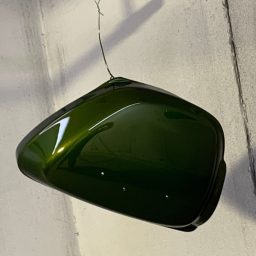

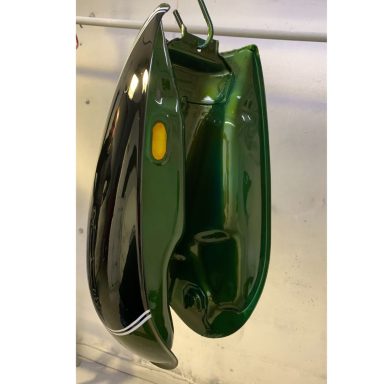
Esmarelda gets a new coat
Our upcoming project 'Esmerelda' is named after the latin word esmeraldus meaning 'bright green precious stone' and of course in Spanish means Emerald, which we hope she will become in time. We found her in the Isle of Wight and we did say at the time we fancied going all out on her, well the tank and side panels are nearing completion and I think you will agree, Bucchus Olive Green is an amazing start on her journey of what looks more and more a nut and bolt job! Together with Michaels skill to apply the pinstripes in paint, a better way we feel, we have been able to source a reproduction Mole unit for the chrome effect along the base, we were lucky as they are very rare so we grabbed it when it became available.
Our thanks to Michael at North East Custom Coatings for his work on this project and RS Bike Paint Ltd for the supply of the Bucchus Olive Green we needed.
Meet Gavin ... buyer beware!
Gavin is a CB500/4 K1 with high miles on the clock, always a worry. It came to us as a good solid bike, and indeed he is. That said he has been subject to neglect as so many bikes are today. The tank and sidepanels were so grubby our clay bars were sticking even with a lube applied and we needed to revert to sterner stuff but even then after an appraisal at the paint shop it is off with the old and he is going Candy Garnet Brown! The frame is covered in areas of rust, powder coating is a necessity here. The engine was anodising and will take some hours of polishing to make good again and with our friends RS Paintwork we will be able to repaint him in exactly the correct colours before it goes back into the frame. The chromework was better than expected with a decent front end and rear mudguard however the pipes were shot but we have a spare set thankfully so these will be very useful. The wheels will be our first time to rebuild with new rims and spokes kindly supplied by David Silver Spares.
Engine wise we are not sure yet as he is only running on numbers 1 and 4 suggesting a dead left hand coil but we tend to replace coils on our rebuilds nowerdays so this may well rectify itself however one area of concern is what is this masking as the seller knew of the issue removing the coils to 2 and 3 and there may be a reason, time will tell, remember it was sold to us as a runner, yes, on 2 cylinders thanks very much, is honesty so difficult nowerdays?
Other than this he will be treated to the normal Four Bores upgrades including the clocks and brakes overhauled then though I believe we will have a really good English CB500/4 which will turn a few heads as time goes by.
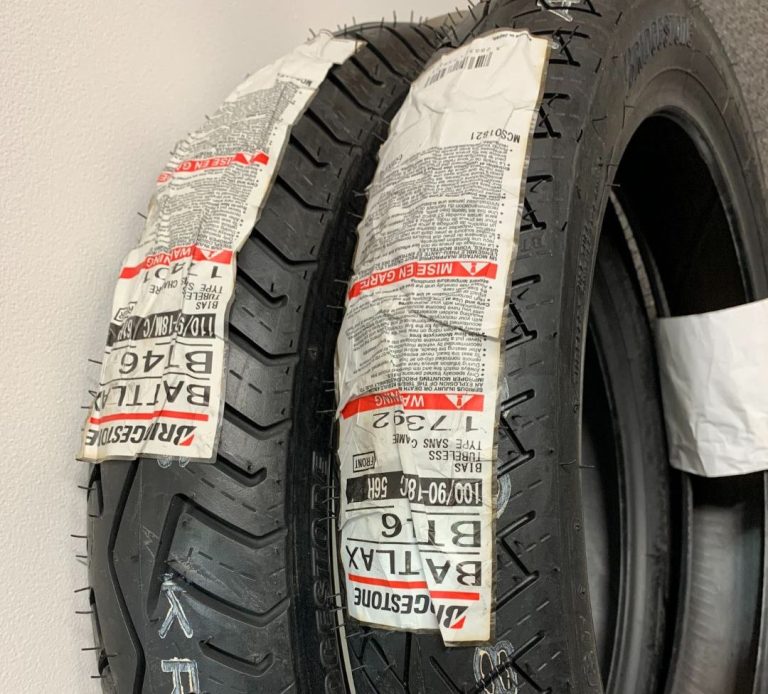
New rubber for our CB400/4
We plump for Bridgestone's latest offering, the BT46
Bridgestone certainly make great tyes, I run BT45's on the CB500's but the latest BT46 boasts a "Silica Rich Compound" which, they say, offers better grip in the early stages of a ride, really good to hear as we all know our grip, or lack of it, in the wet but how many of us adjust grip capability when we just pull away, especially on a cold day?
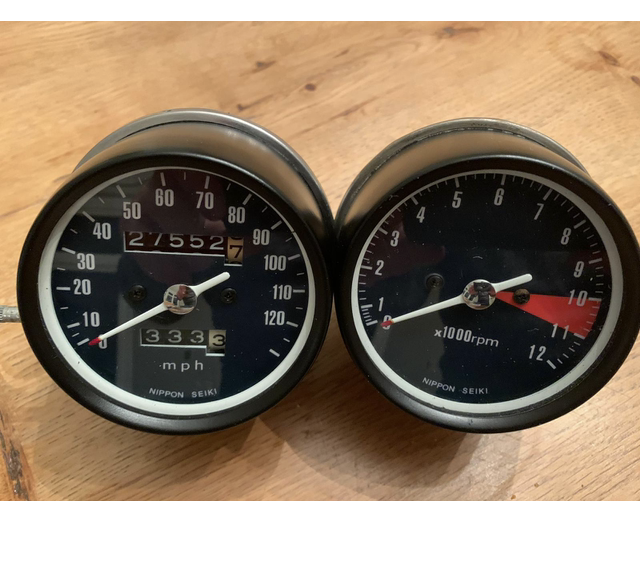
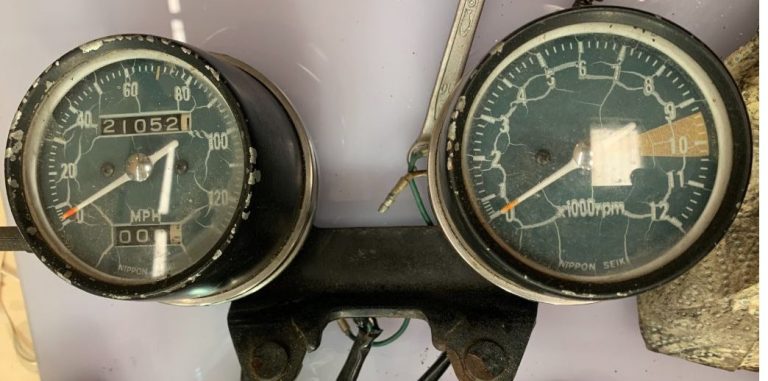
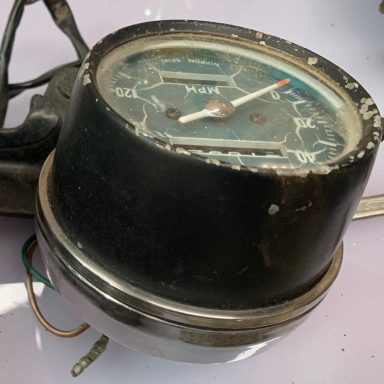
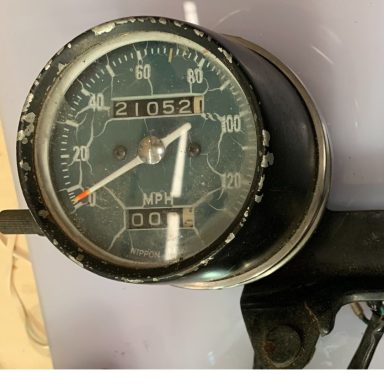
Age is only a number, these are over 50
These clocks, although decent and in working order needed new dials and a lick of paint. See how we managed to open and close them with a handy home made jig which made life a lot easier
Any difficult job is really just a whole lot of easy jobs put together!
"Esmerelda's" engine was left to its own devices without carbs on to in any way try to protect the bores for 20+ years, which is sadly more often than not the fate of many a superb CB500/4 K1. This one we found in the Isle of Wight and its engine is currently undergoing a full rebuild for the next project where we take on "Esmerelda" with warts and all!.
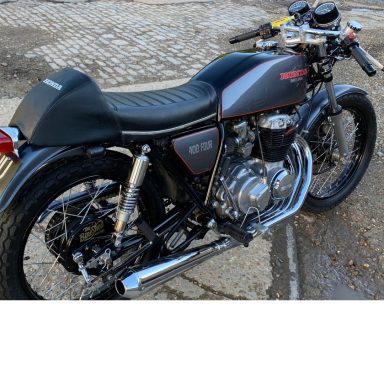
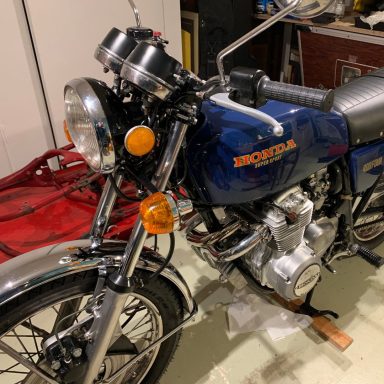
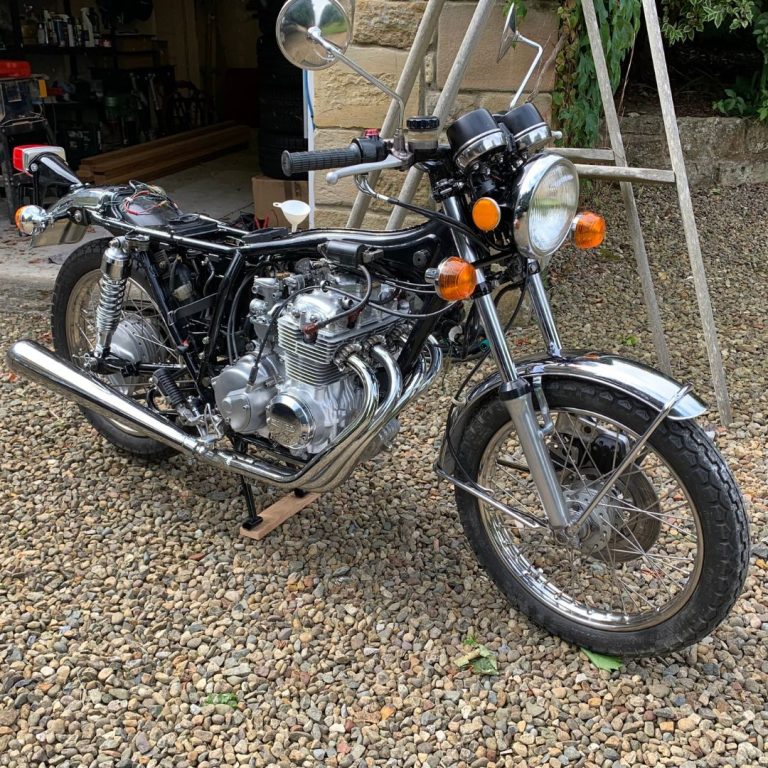
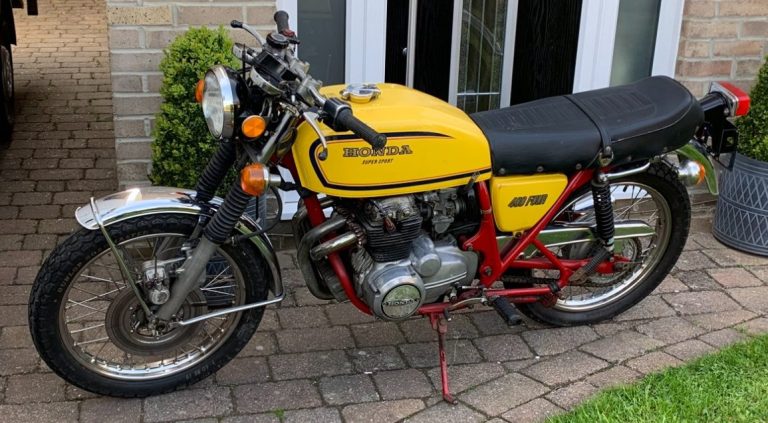
Vanquish our CB400/4 F1
Our first project was this really beautiful Honda now nearing completion, the BT46's are for her. Left to it's own devices for many years it was first bought by Phil some 10 years ago where he started to think how best to restore her, check out the latest photo's as to where she is today. We are looking to clear coat the tank and sidepanels over the logo's before we apply the finishing touches.
One for the future a CB400/4 F2
The better one of our stock ready for rebuild is this Parakeet Yellow beauty, well I say beauty but in reality she has suffered the indignity of having her frame painted red which does her no favours! That said underneath she is a super base bike to rebuild, the F2 was given a neat new look including stripes on the tank, original "go faster" stripes? Perhaps. The frame was changed to accept the rear footrests to be on a loop from the main body. New colours included the aforementioned Parakeet Yellow and Candy Antares Red.

We welcome "Esmerelda" feeling a bit under the weather!
We love these bikes, to us they are a thing of beauty, well most of the time! This one is described in more detail on the projects page but she is going to be a challenge.
Were off to the vapour blasters!
These look pretty grubby but our friend Jill knows just what they need! There going to a 'new to us' Zinc plater business near Newcastle, if good we will publish their information for you in due course.
Before ...
And after ... what a difference, now the platers beckons!

"Esmerelda" a CB500/4 K1
Time takes it's toll
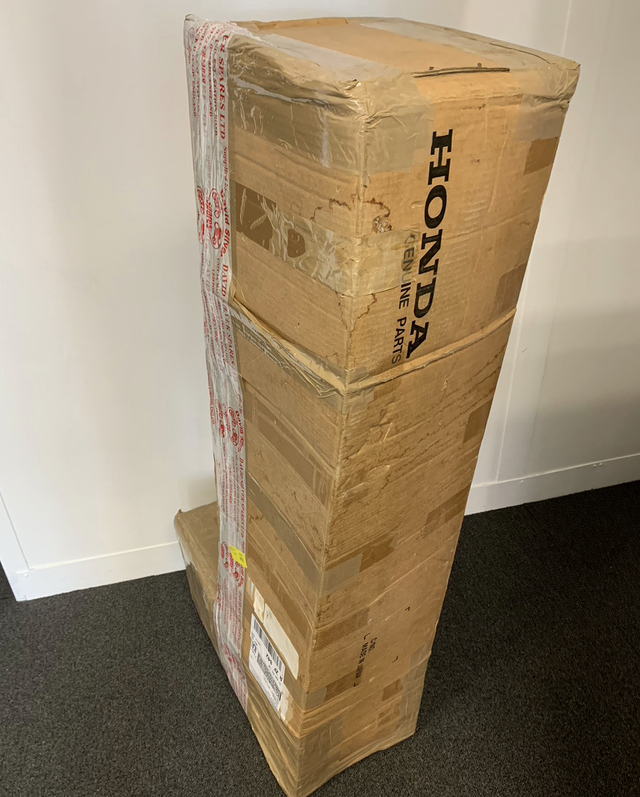
Hens Teeth
You really don't get much more rare than this find, I know, it's a box, but no ordinary box as it contains an original set of pipes for a Honda 400/4 F1 kindly supplied to us by David Silver Parts. We are also very fortunate to own a similar set of pipes OEM brand new, again in the box, set of tulip pipes for a CB500/4 K1, amazing find!
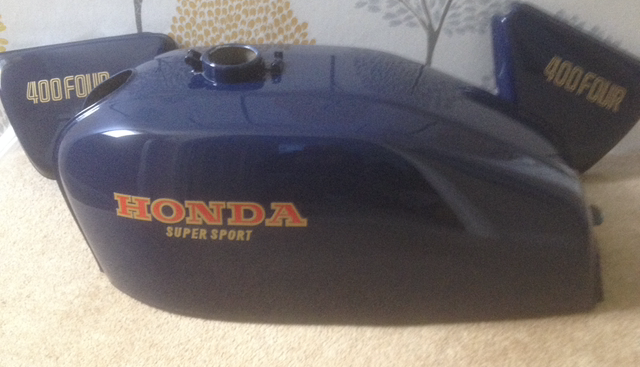
A tank needs to be right
We are blessed today having a veritable industry of business' set up to pander after our every need and here is a gorgeous tank and side panels for the F1 project in Varnish Blue, pretty as a picture.
This tank is now ready and will be fitted soon, look forward to the images to follow... We have just also awarded a job for our next project, a tank and side panels to one of our best local 'artists' otherwise known as 'North East Custom Coatings' to create a Bucchus Olive Green tank and side panels, these are now on the Gallery and look tremendous, see gallery.
Another Clocks job for our next project
Believe it or not these are pretty good, yes obviously the inner dials are shot but they can be replaced, we will publish our jig for ensuring the dials drop perfectly into place at a later date, the outer casings are just in need of a good rub down and a couple of coats of paint, the bases are really good, a nice set of clocks off a CB500/4 K1 that soon will be pride of place on the CB500/4 project coming along shortly. We have found a new dial supplier, this order has been placed with them, we have a few to do but as a first try we will just go for this set, if we like them we will look to add them to our suppliers page, fingers crossed.
New stock arrives
These bikes offer us a wealth of potential in parts, one of them is destined to go full rebuild, maybe two, can you spot Esmerelda?

We look at Vapour Blasting / Honing, amazing yes but you do need to understand the jobs that are wise after the parts come back.
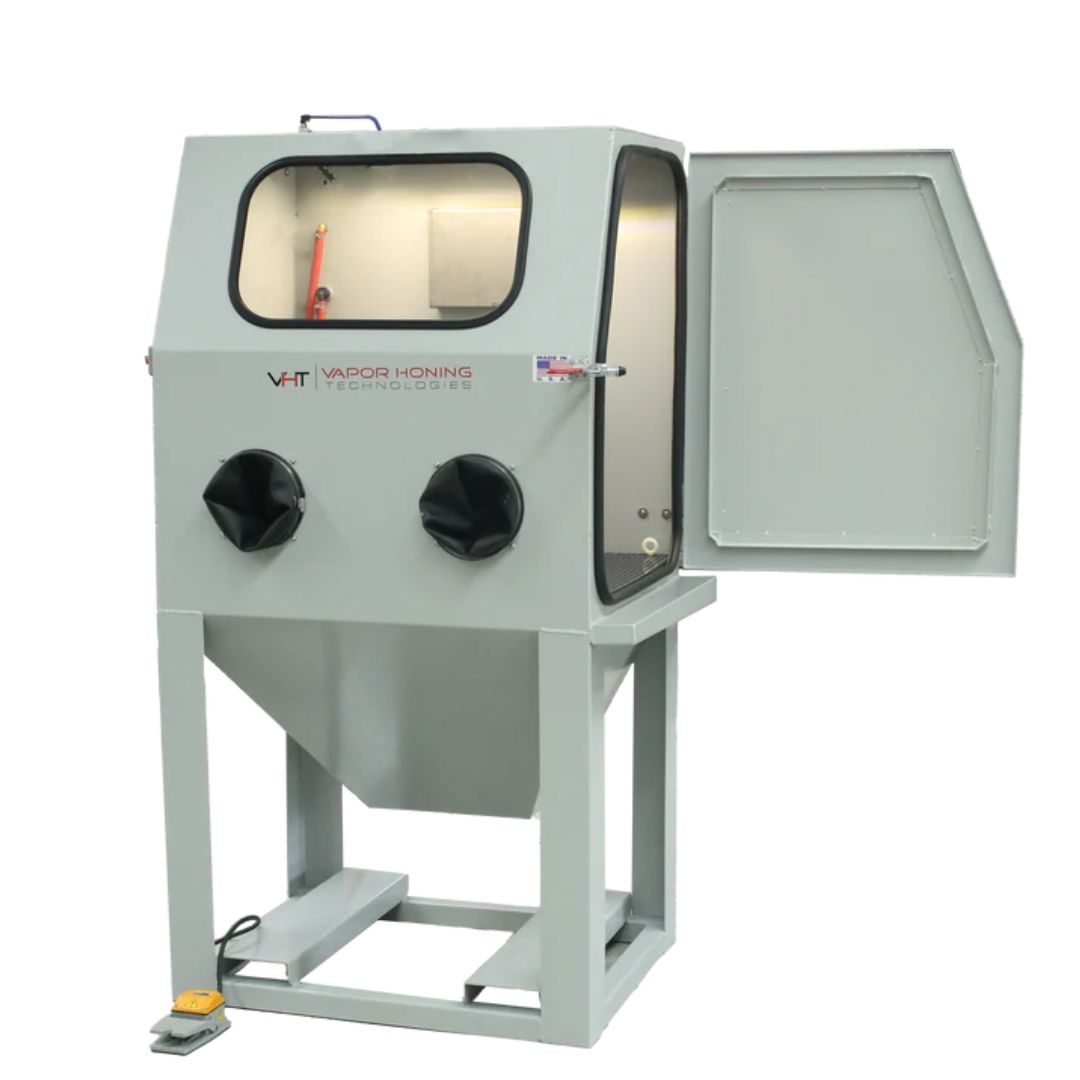
Vapour Blasting, what a find, a very gentle way of cleaning parts to a level that on many occasions is perfect for us renovation hobbyists. So what is vapour blasting? It is a process that uses an abrasive media, glass beads, suspended in water, if you want to see what that looks like see the image below, that's the stuff, applied with a pressurised blasting technique to remove dirt / light rust (and more) while simultaneously cleaning and prepping a surface. Now the important part is abrasive, the process uses the finest of particles, abrasive media, which is suspended in water and we need to understand this can cause us problems in certain instances. Materials that are suitable are wide ranging, things like aluminium, stainless steel, brass, copper, mild steel, rubber, and plastics can all be candidates for this cleaning method.
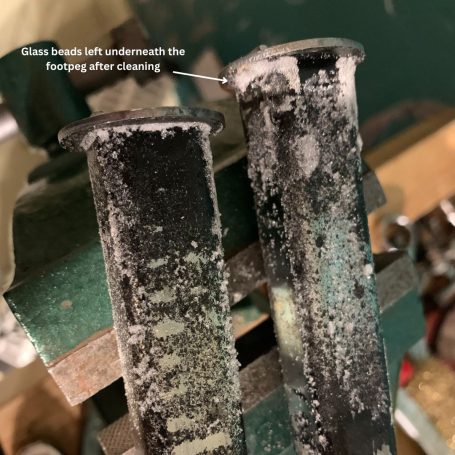
With this in mind when we send parts into the basters it is good to dismantle parts to the absolute max, nuts and bolts separated, parts dismantled as far as possible so this abrasive medium does not stay in the parts as best as possible. As you can see with the images our footpegs came out really good but look as what is left underneath the rubber, this is because we left the rubber in place, mistake, we should have dismantled them as far as they go.
Sometimes we cannot help this residue for example a thread will gather the medium around the nut if left on when processed, the threads already are areas that need to be cleaned by running a nut over them even if done without the nuts left on, and believe me when I say the nuts can be tight, gritty and sometimes very difficult to screw back on, I find turning in and out slowly working further on, small turns and gently until you are all the way in, take your time. When doing parts with small screws it is more obvious, you will need to be very careful putting the screws back in to threads as they probably will be gummed up with the medium, this is easily resolved once you know what your dealing with, use a blast or two of wd40 to take the medium out things if needed.
We had a set of carbs blasted with fabulous results, it was our first time and the screws just did not want to go back in at all, the threads on the inside were absolutely impossible to screw straight in, we were at a loss until we clicked, in out in out and patience and guess what, they freed off easily, it is worth noting that once done there is no need to do again.
Now you can understand why engines need to be fully striped before blasting, wheels need the bearings out, trust me the bearings would be toast if they were left in.
Vapour Blasting, or honing is an absolutely fantastic way we can gently return parts to their original look, especially rubber and plastic, alloy casings and heads, unreal once you realise what you have to do once finished.
We are starting on a nut and bolt restoration of a pretty poor in all honesty CB500/4 K1 so we are using this process for the engine bolts and the end result is truly superb, we needed to really take time to clean the threads as discussed and of course wire wheel the heads before zinc plating, a long and laborious job but the end result makes it all worthwhile.
So, vapour blasting, what do we think? No question it is a gamechanger, just be aware of what your working with, understand how you need to finish the parts, what you can and what you cannot use with this process and your away, the people we use are also extremely knowledgeable, do great work and are really nice to boot! They are only to happy to help us through the method, we suggest use this invaluable source of knowledge in this case.

It's mechanics Jim but not as we know it!
We get to grips with a heavy clutch, the old CB500/4 K1 had a couple of issues, read how we got on here.
Get in touch
We have lots of experience now working on these bikes, if you are a beginner and just need some help or perhaps you are looking to get into the hobby please feel free to get in touch, we would be only to happy to help as and where we can
David Silver holds an open day in celebration of 50 years of the Honda CB400/4
Open Day plus 50 Years Celebration of the iconic Honda CB400F Four - Saturday 28th September 2024
Honda Open Day with LIVE 1970s Rock Music and Best-in-Class Contest Celebrating 50 Years of the iconic Honda CB400F Four.
Having first gone on sale in 1975 the CB400F soon became a favourite amongst British bikers and has remained a much-loved classic for almost 50-years!
The FREE admission event is open to all motorcycle enthusiasts and for those with a1970s Honda CB400F a contest will be held to find the ‘Best-in-Class’ in 6 different categories.
The special Open Day will featurethe following…
• Unique display ofan extensive array of 1970s CB400F’s
• Judging &Awards Ceremony with 6 different ‘Best-in-Class’ CB400F awards.
• LIVE 1960s/70s/80s rock-music band.
• Honda CB400F HistoryQuiz’ – Win a £100.00 Honda Parts Voucher!
• CB400F Used Parts Auto jumble (plots available, see below)
• FREE entry to the event with FREE car & motorcycle parking.
• FREE admission to museum with over 200 period Honda motorcycles on display.
• Hot/Cold food refreshments plus drinks bar.
• Honda new parts& used bike sales counter open.
• Visitor facilities including disabled access to the museum.
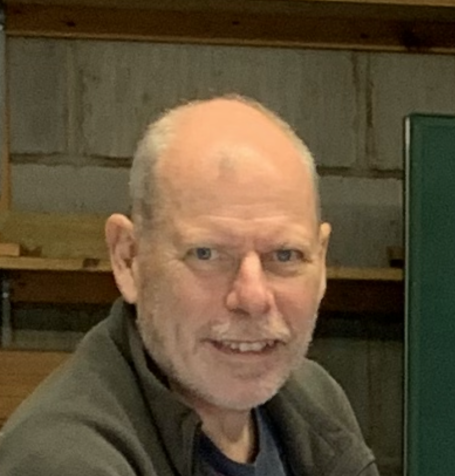
Three Bores of the Four Bores Team
The Founders

Philip
Founder
Phil is in charge of visuals, he passes finishes, ensures things look as they should and generally keeps us all on our toes. A master when things are difficult he is the go to man when things are stuck, as they more often than not are of course!
Kev
Founder
Kev is our technical guru, electrics being his speciality but all things really, if it doesn't work don't worry, Kev will work it out in, well sometimes days but who's counting!

Ian
Founder
Haynes manual expert (relative) and tea maker extraordinaire Ian is a safe pair of hands always happy to take on any job with an open mind. An eternal optimist he loves to see progress as the bike comes together.